Here is a Fix for Windows 10 Lock Screen Slideshow Not Working.
Windows has a feature where we get a Picture Slideshow on the Lockscreen. However, some users complain that the Lock Screen Slideshow Not Working on Windows 10. Therefore, we have looked into it and found a Fix.
Also, check out other Personalization options like How to Change Taskbar Color, and How to Change Mouse Pointer Color.
First, make sure you are following the correct method to Enable Slideshow on Windows 10 Lock Screen.
Table of Contents
How to Make a Slideshow Lockscreen Windows 10:
Here is a step-by-step tutorial on How to Make a Slideshow Lockscreen Windows 10.
- Go to Windows Settings through the Start button.
- Open Personalization Settings.
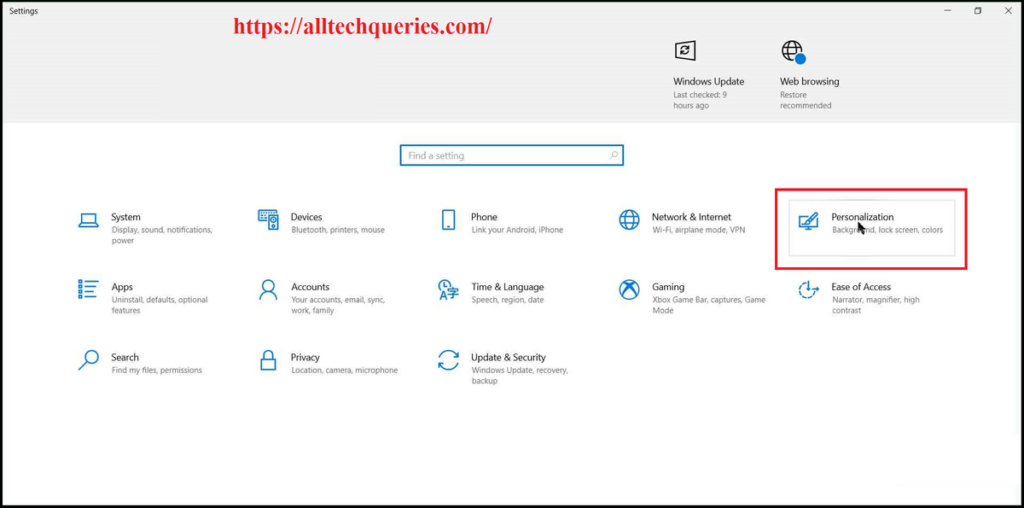
- Click on the Lock Screen menu in the left section.
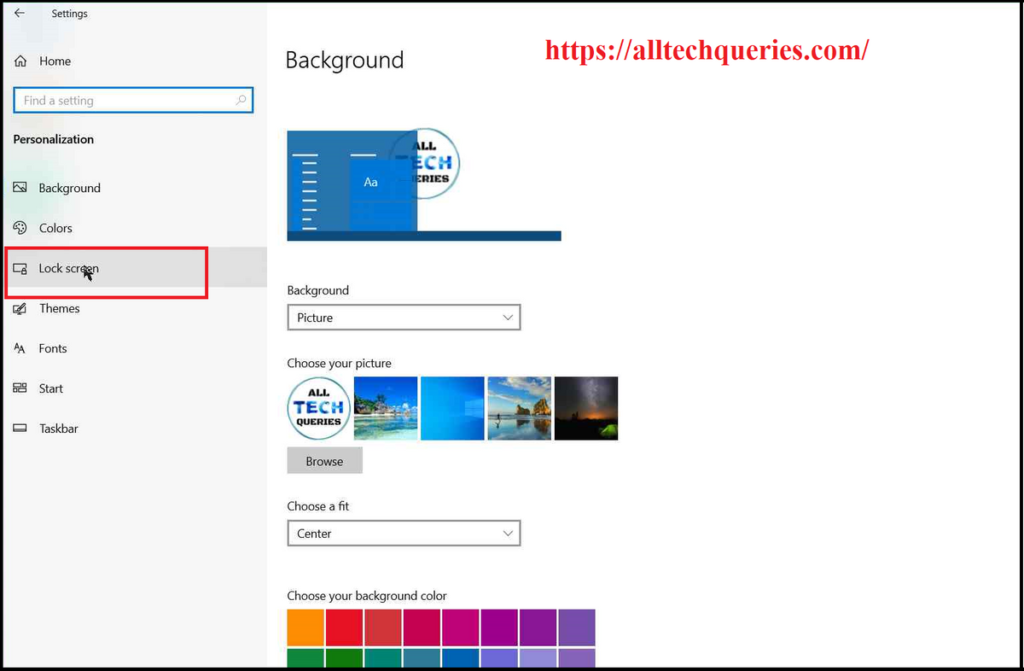
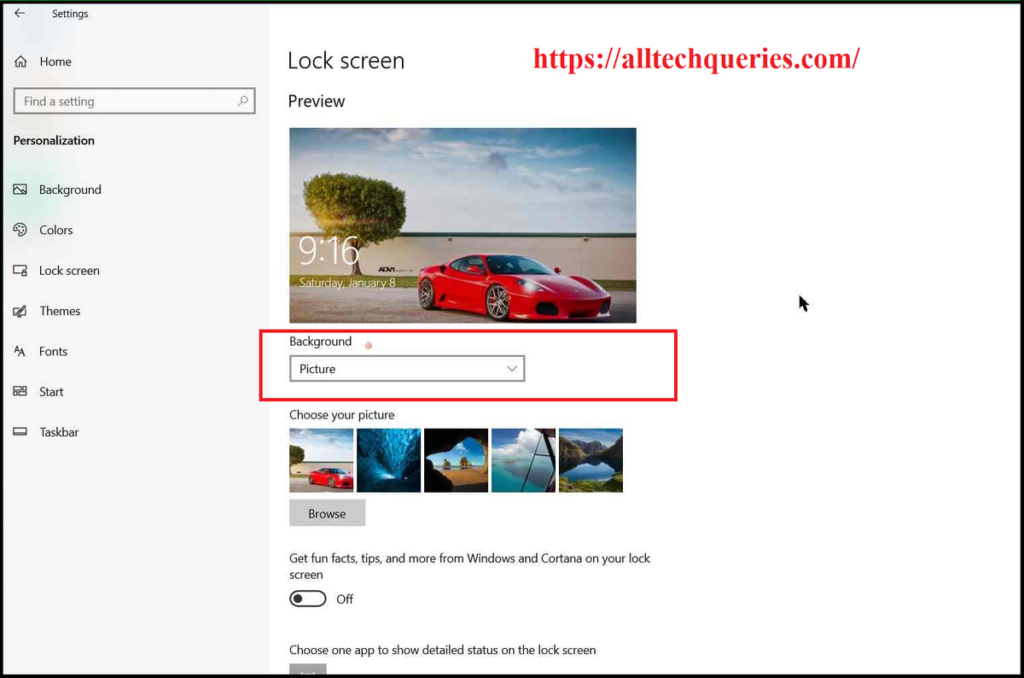
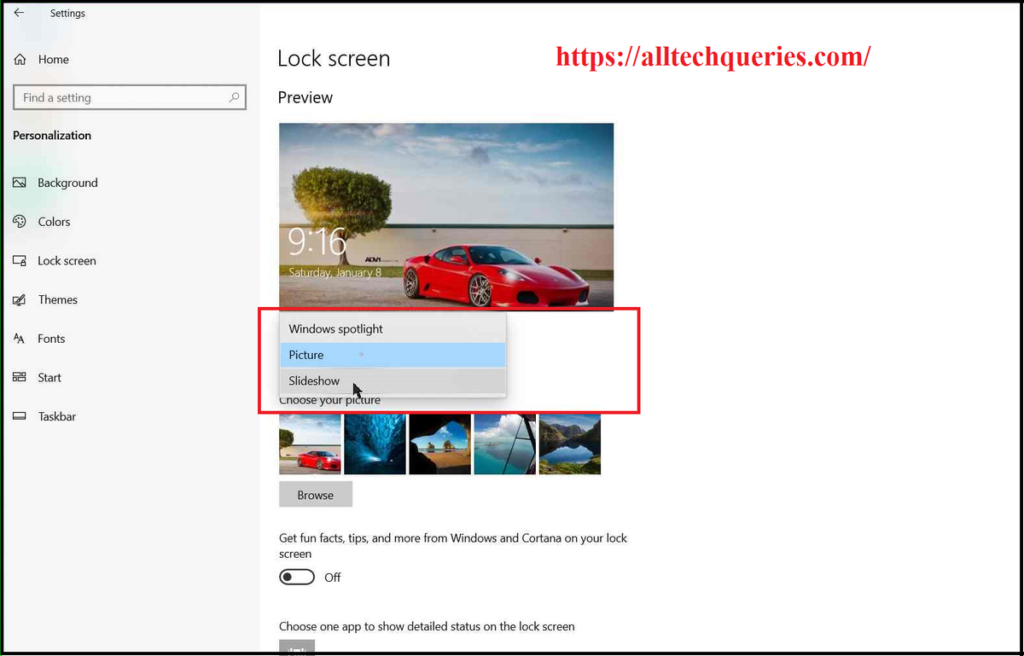
- Under the option Background, there is a drop-down menu that contains three options that are Windows Spotlight, Picture, and Slideshow.
- You need to choose the Slideshow option.
(Before that, we suggest you create a new folder on your PC and add all your favorite pictures to show on the Slideshow)
- Then, a new set of options appear below it. Here you need to remove the Pictures folder and choose the option Add a Folder to add your custom folder.
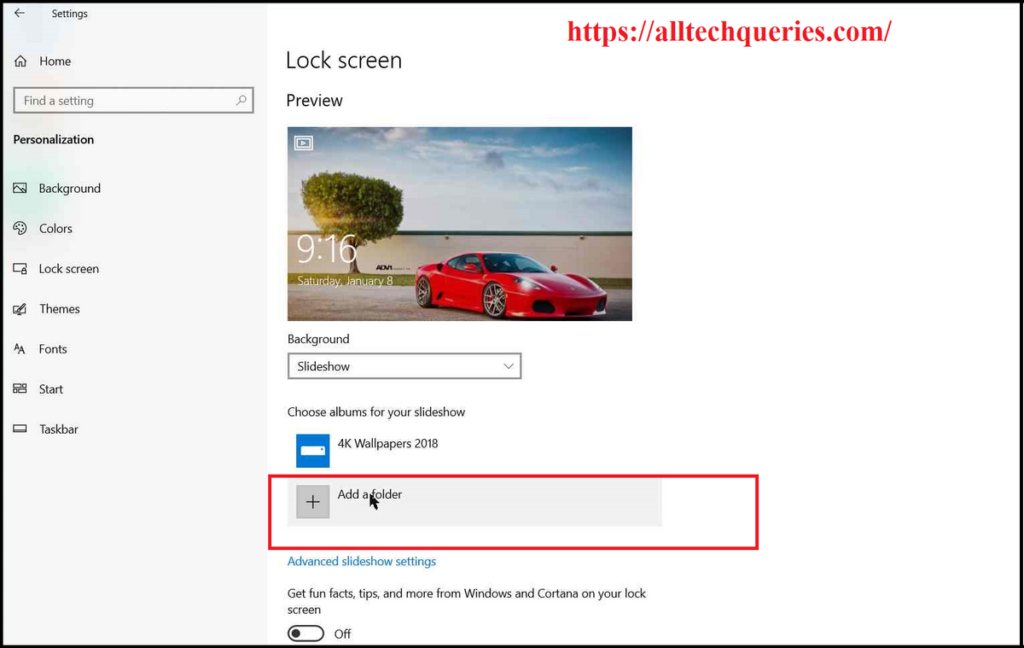
You should be able to see the Slideshow on your Lock Screen. If you are still facing issues, follow the below guide.
Windows 10 Lock Screen Slideshow Not Working:
Fix 1:
- Go To Windows Settings -> Personalization -> Lock Screen.
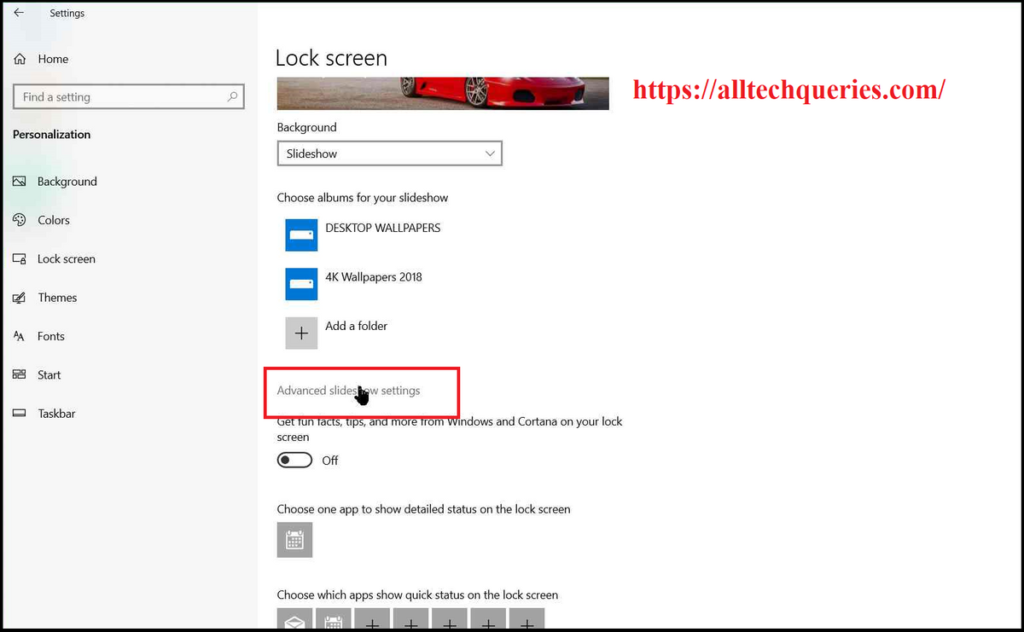
- After you have set the Slideshow, click on the Advanced Slideshow Settings option.
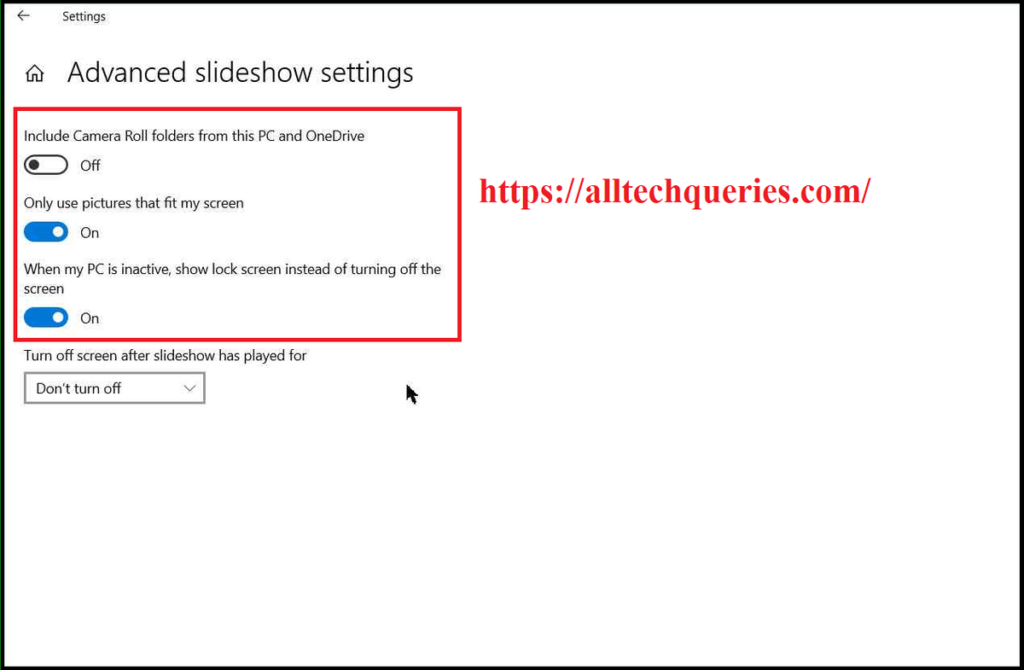
- Here you will get four settings.
- The first option is to Include Camera Roll Folders. It is upto you, whether you want to include those pictures or not.
- The second option is Only Use Pictures that fit my Screen. The option is enabled by default. So, this might be the problem. Maybe the pictures you selected are of small resolution. Therefore, Windows is not adding them to the Slideshow list. Disable the option.
- Next, Enable the Third Option, so that Windows will lock the screen instead of turning off the screen.
With this, your problem should be solved. If not, continue with Fix 2.
Fix 2:
Under the same settings (Windows Settings -> Personalization -> Lock Screen -> Advanced Slideshow Settings) there is a fourth option
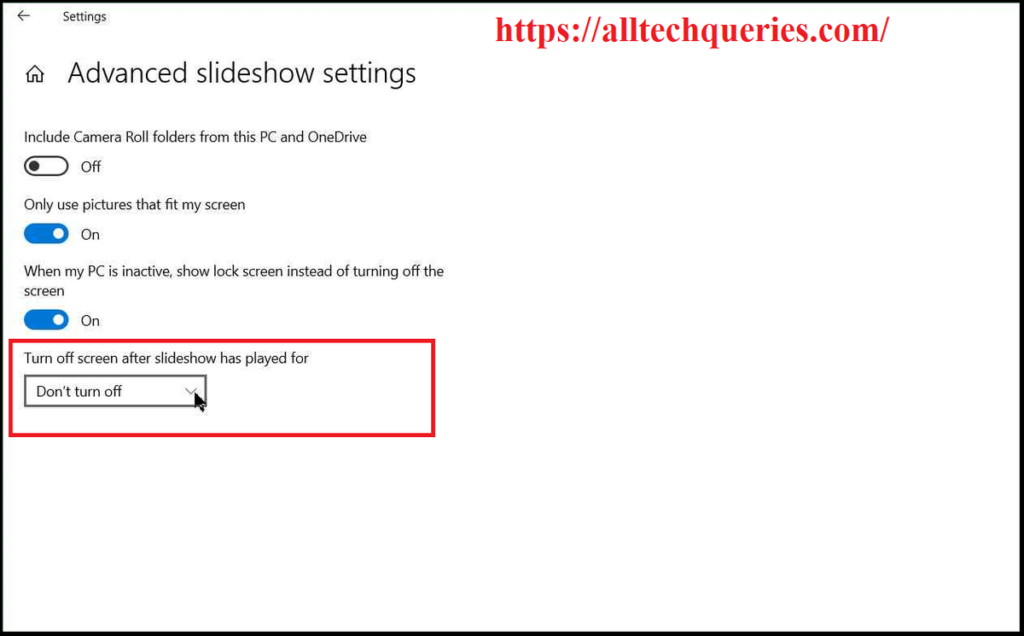
- The fourth option is to turn off the Screen after the slideshow has played. It means, if you have a small collection of pictures, the slideshow will be over soon, and the screen will turn black.
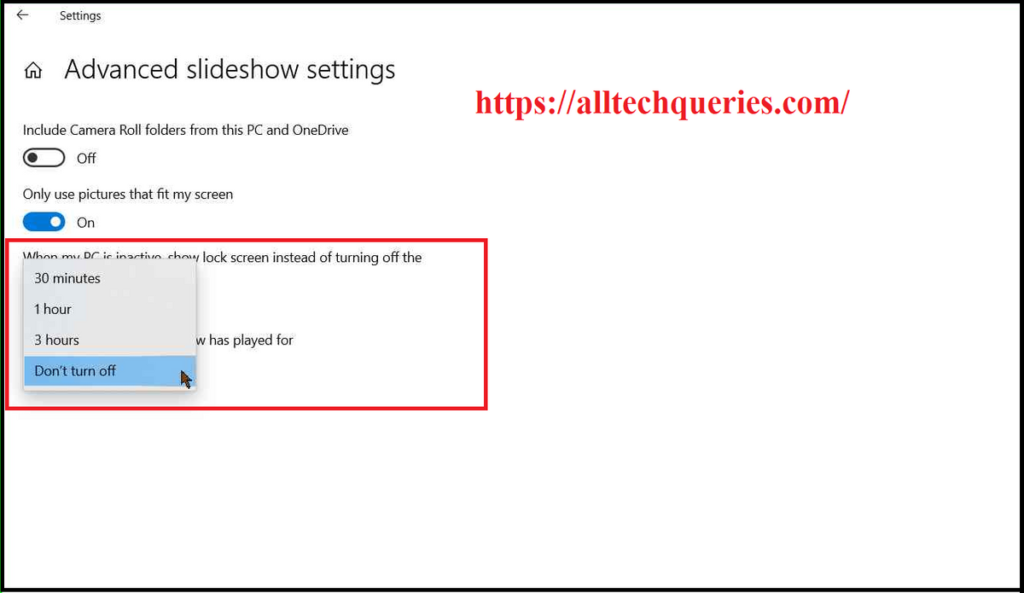
- To avoid it, you need to choose the option 3 hours or Don’t Turn It Off from the drop-down menu.
If the problem exists, go to fix 3.
Fix 3:
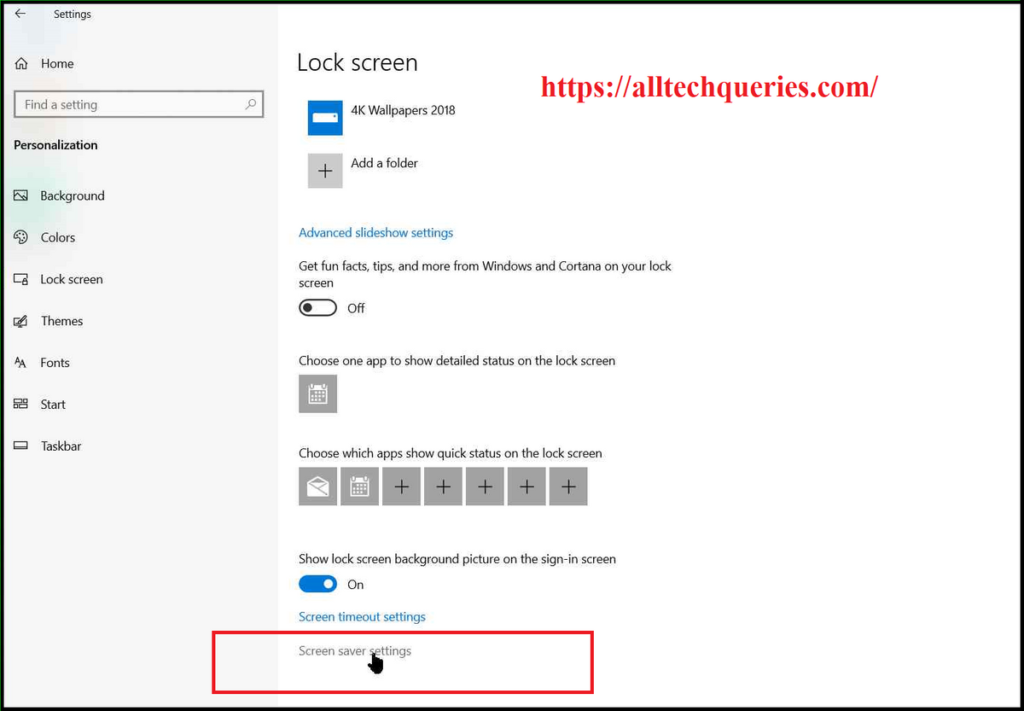
- Again, you need to be on the Lock Screen Settings Page.
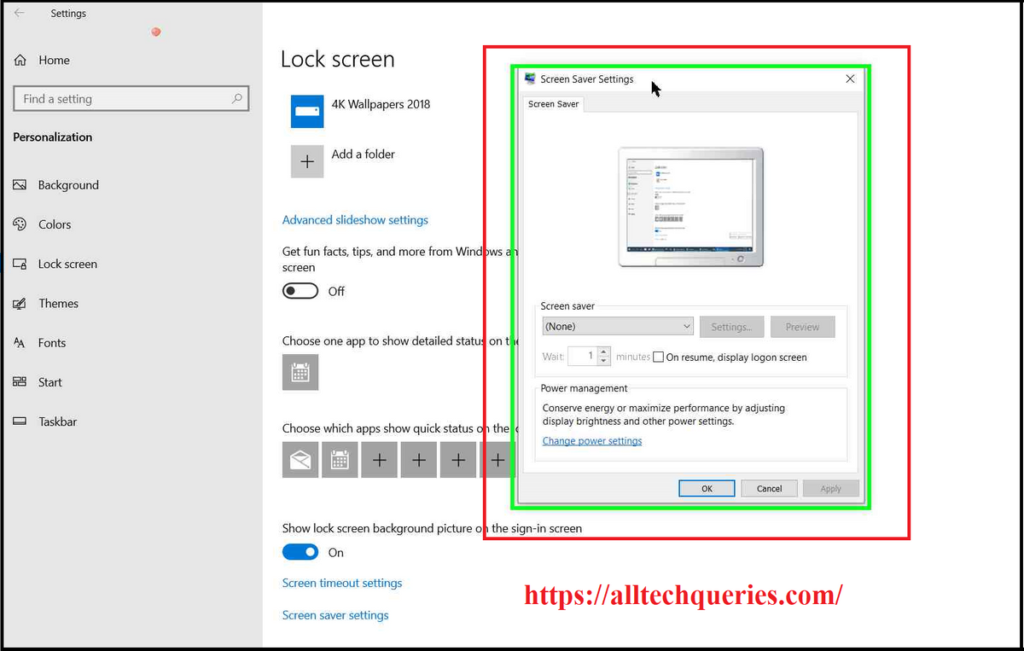
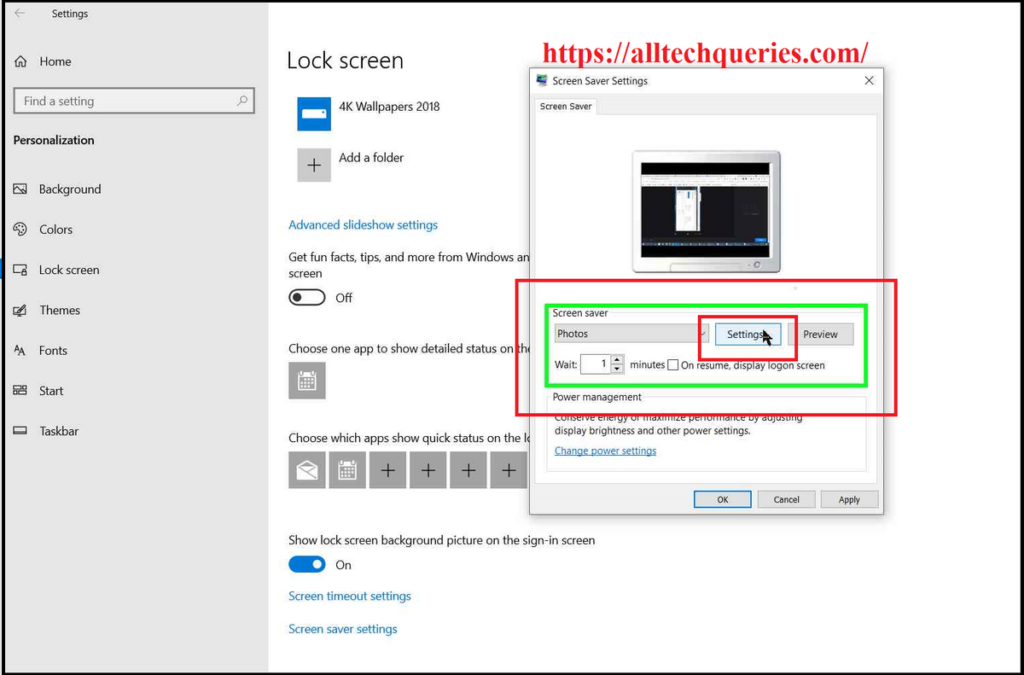
- Here, scroll down to the bottom and click on the option Screen Saver Settings.
- A small window appears, which looks similar to what we have seen in older versions of Windows.
- Now, click on the dropdown menu under Screensaver, and select Photos.
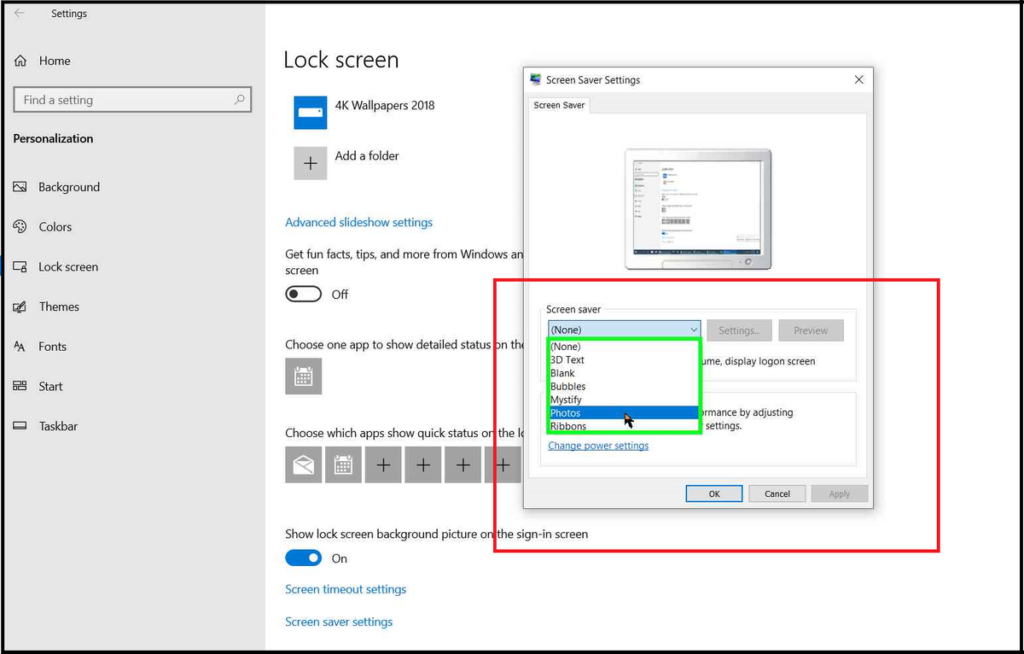
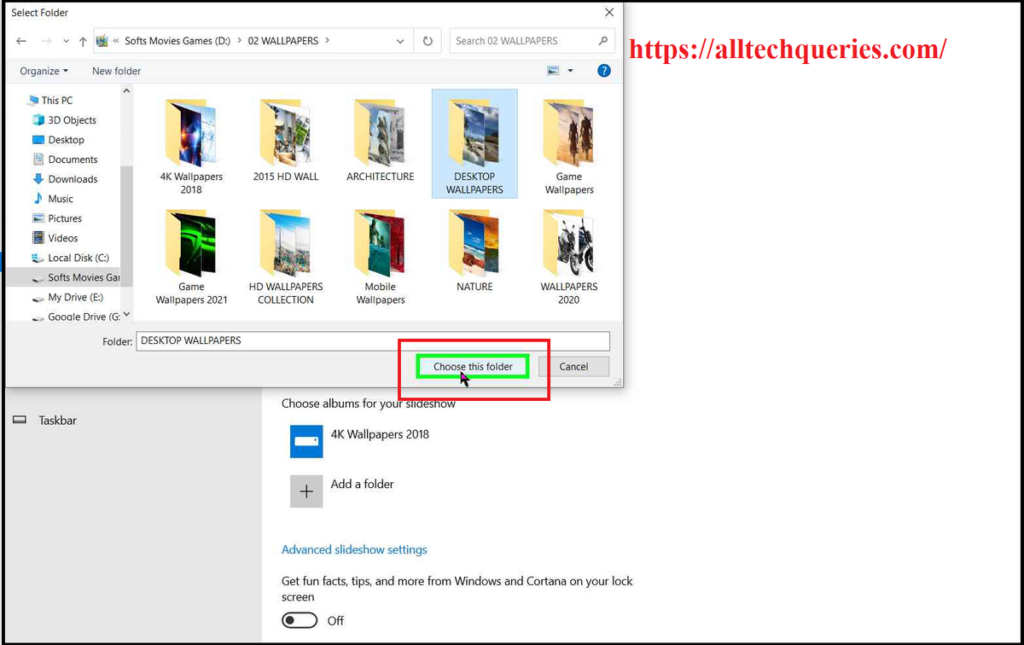
- Next, click on the Settings button beside it, and click on Browse.
- Select the folder you want to show as Slideshow.
- Then Click on OK, Save, Apply, and Ok.
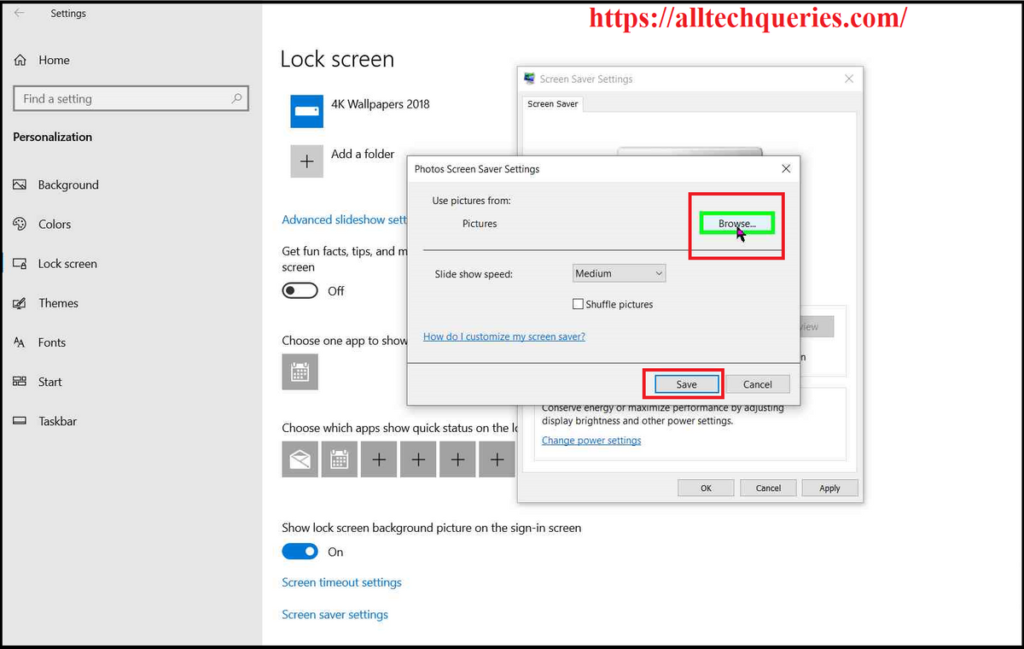
The issue shall be finally fixed.
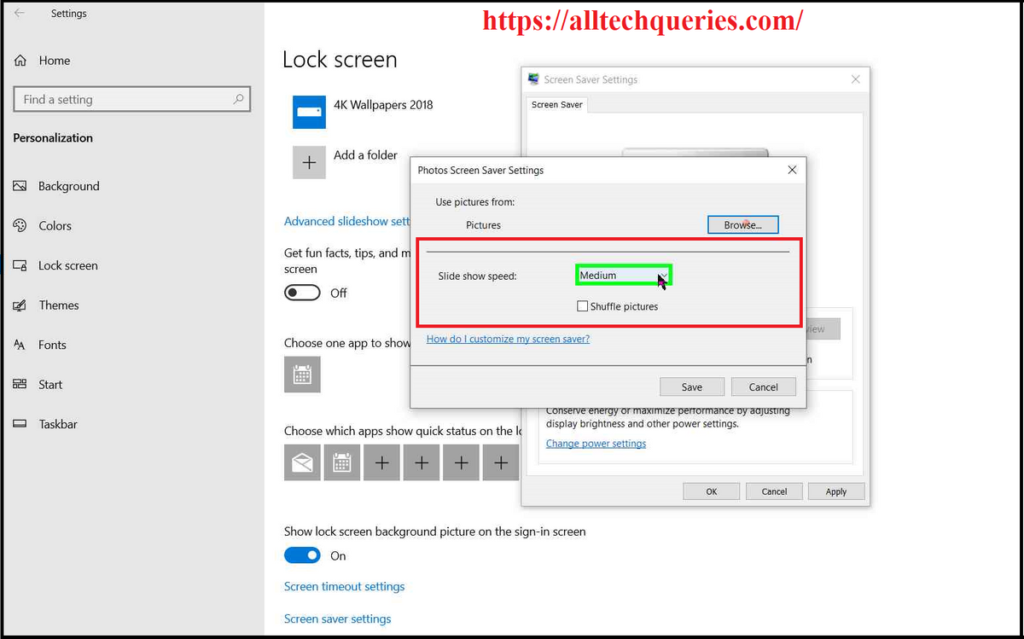
Under the Settings option, you can also change the Slide Show Speed, Enable/Disable Picture Shuffling, Wait Time, and other settings.
Conclusion:
You can follow the guides one by one to Fix Windows 10 Lock Screen Slideshow Not Working issue. If you are still facing any issues, feel free to send us a message through our Contact Us form.

