Last Updated on February 15, 2022 by Tech Queries Team
Here is a tutorial on How to Use Check Box to Select Files and Folders in Windows 10.
In Windows, when we need to select multiple files or folders, we hold the CTRL button and make the selection by using the mouse. However, sometimes when we accidentally release the CTRL button, it will deselect our selection. And sometimes we double-click while selecting multiple folders, which will open up all the folders. Therefore, I use the feature called Check Box to select files and folders conveniently.
And today, I will show you How to Use Check Box to Select Files and Folders in Windows 10 with a step-by-step guide. You can also watch the video below.
Table of Contents
How to Use Check Box to Select Files and Folders in Windows 10
- First, open This PC or any other folder.
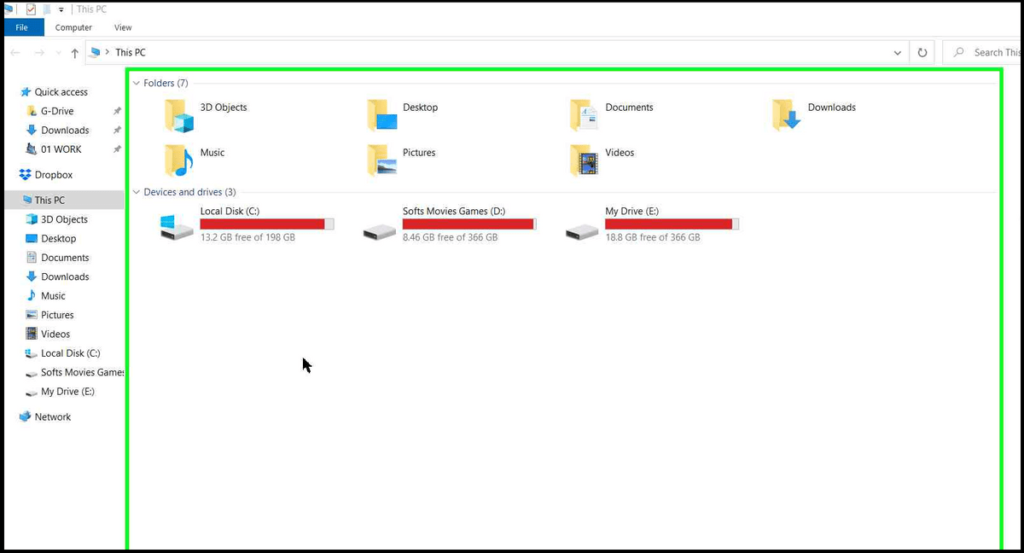
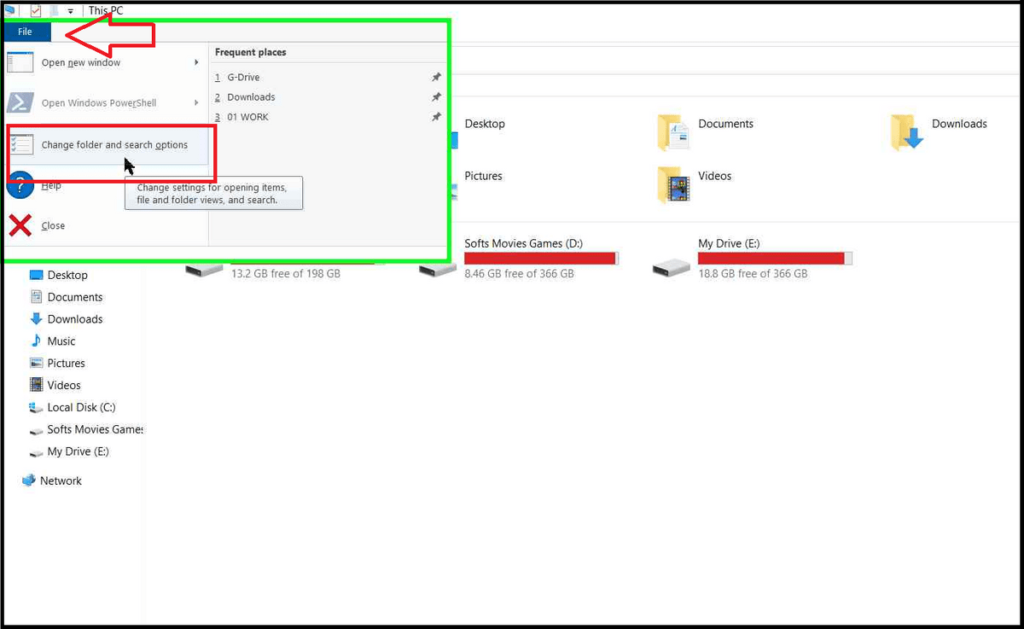
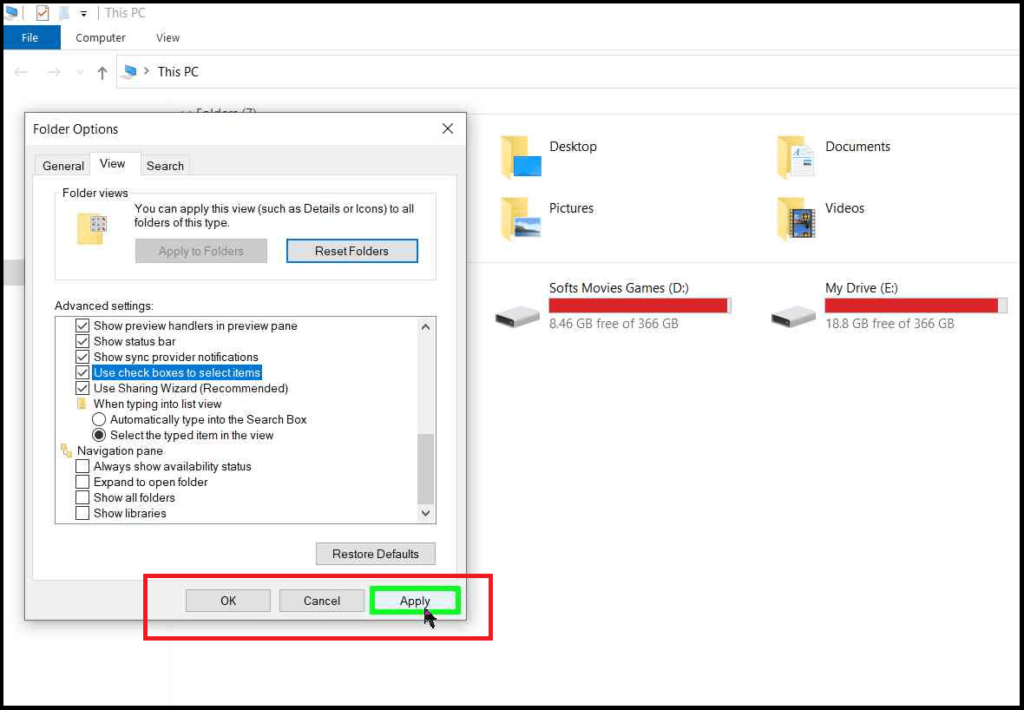
- Go to the File Menu and click on Change Folder and Search Options.
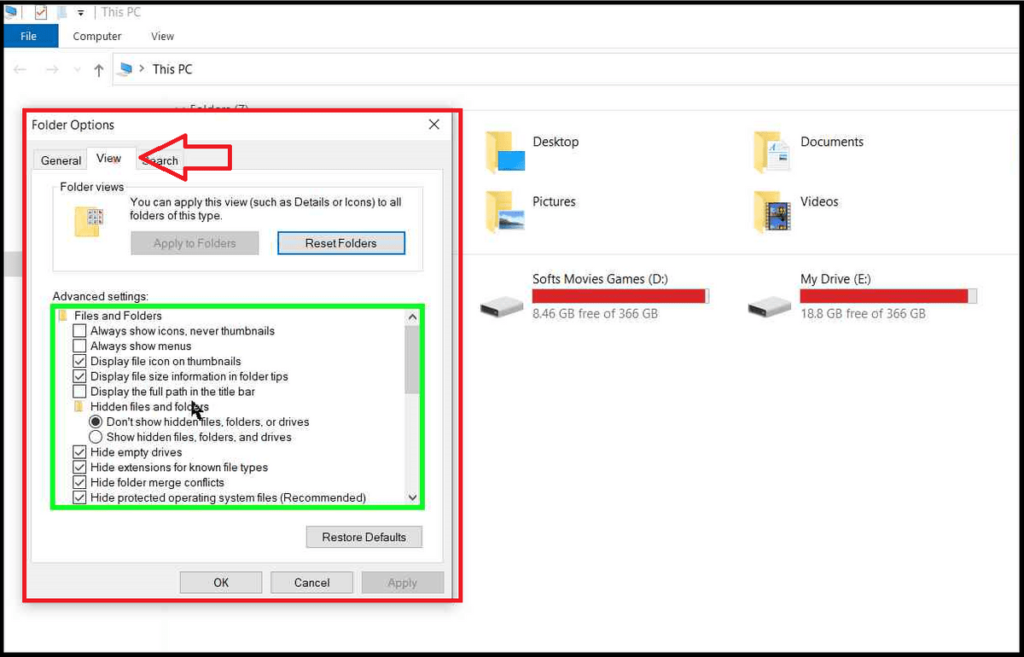
- Next, go to the View tab, and scroll down.
- Here you have to check the option “Use check boxes to select items“.
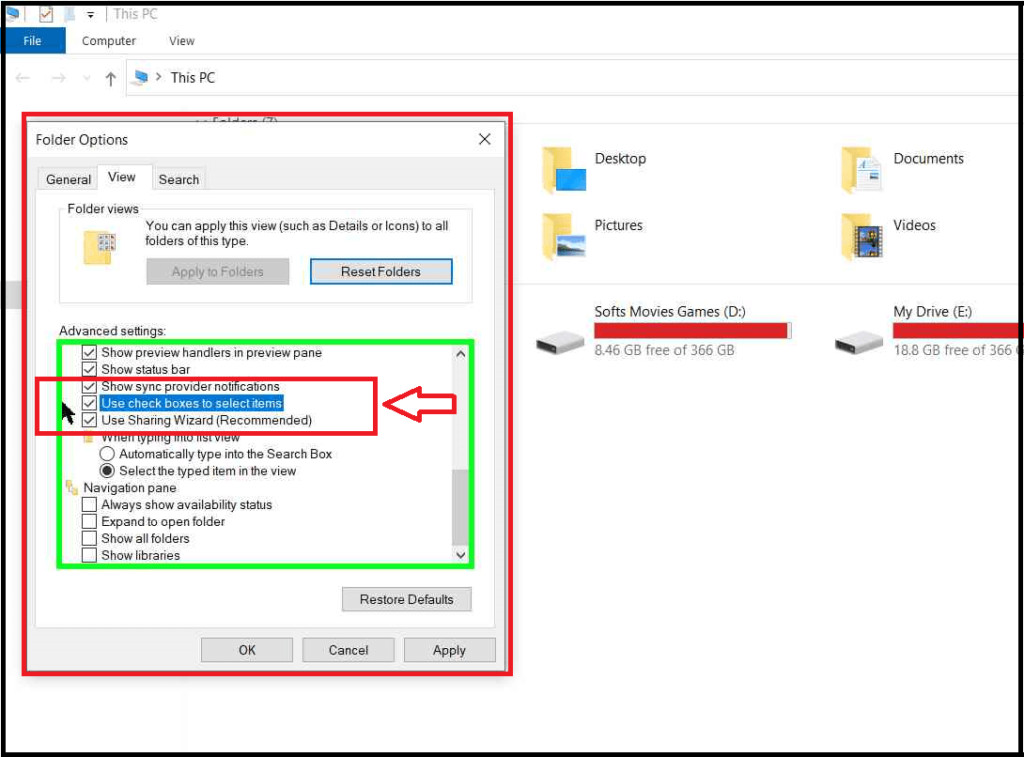
- Finally, click on Apply and OK.
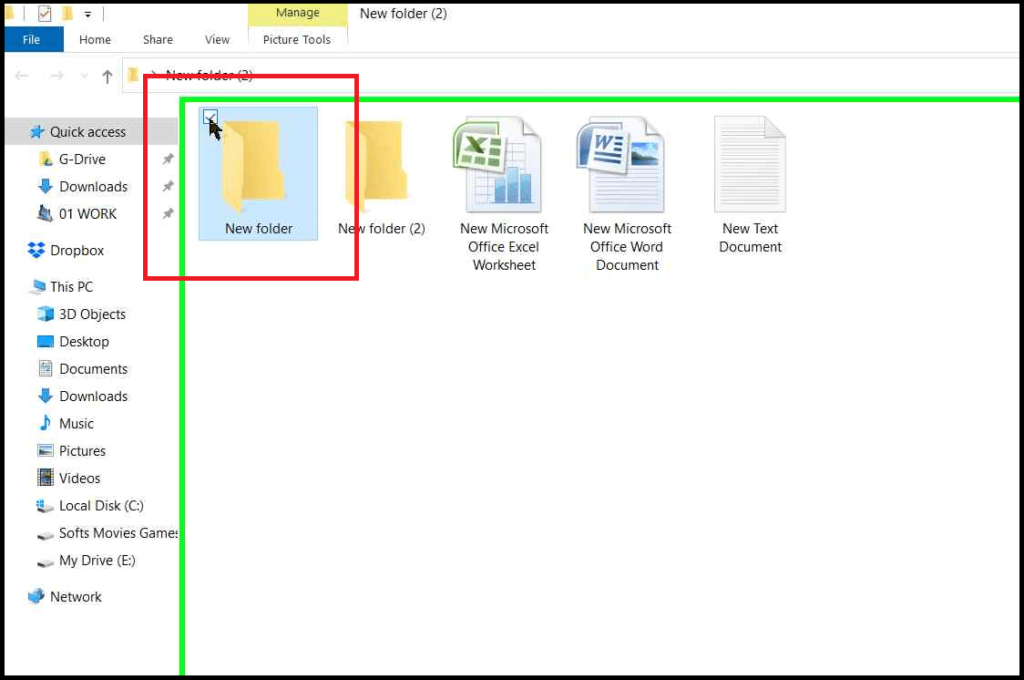
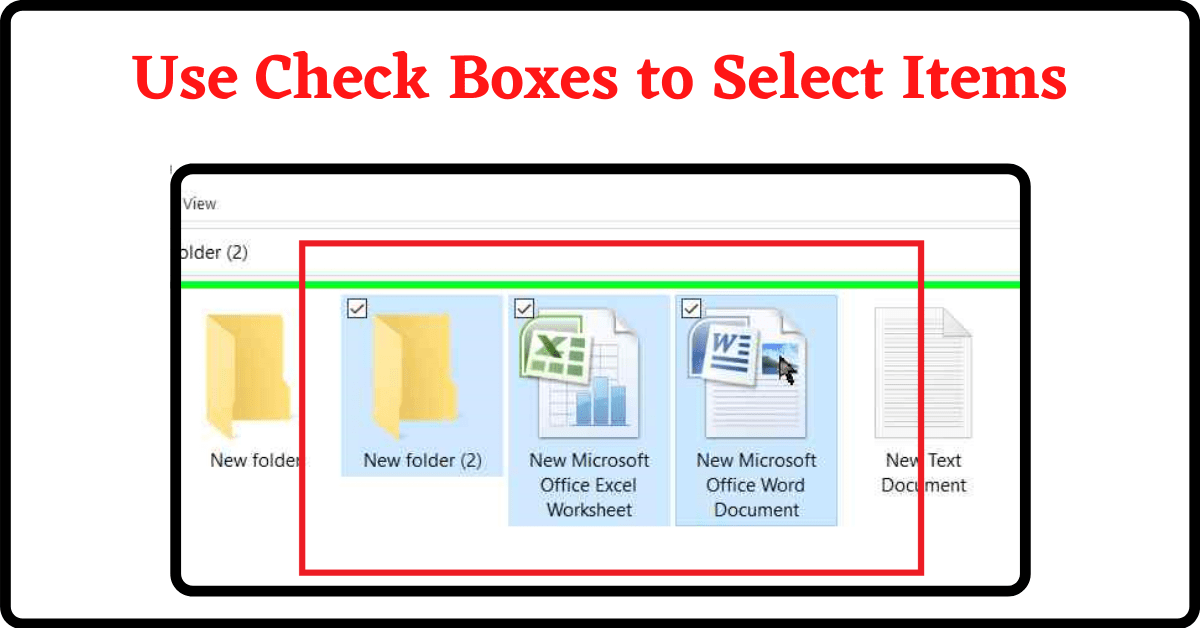
- Now go to any folder, and hover over an item (file or folder) to see the check box.
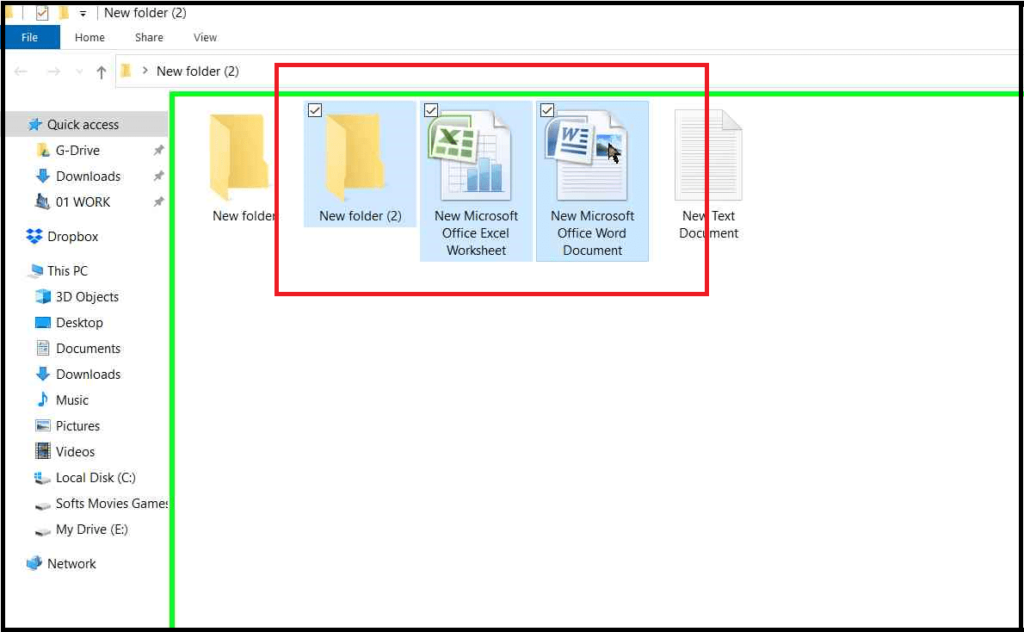
- As you can see in the image, you can select multiple items without holding the CTRL button.
Method 2:
You can also enable/disable the Check Box feature using another method.
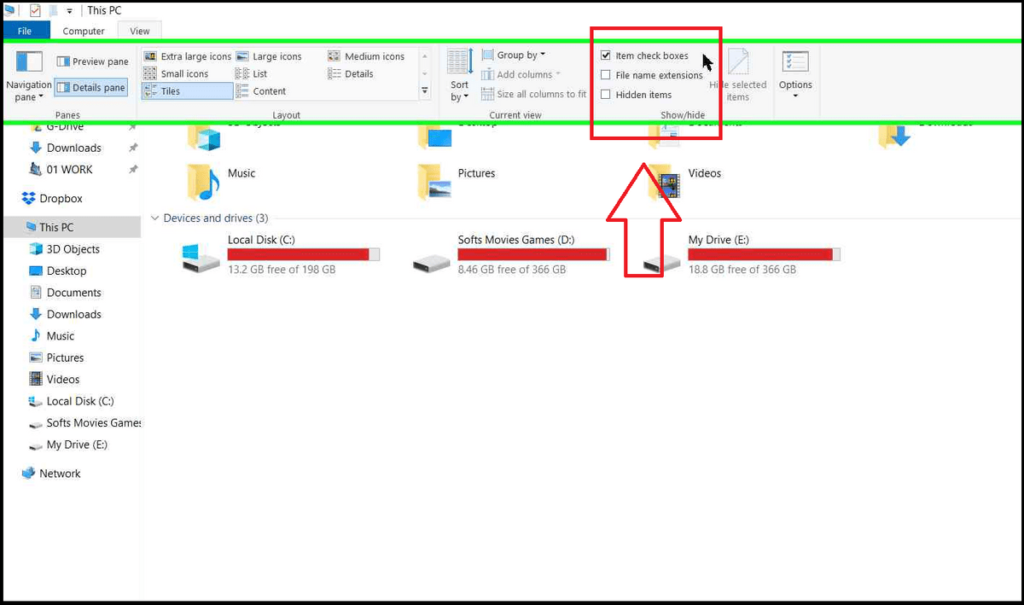
- After opening the File Explorer (a folder), click on the View menu.
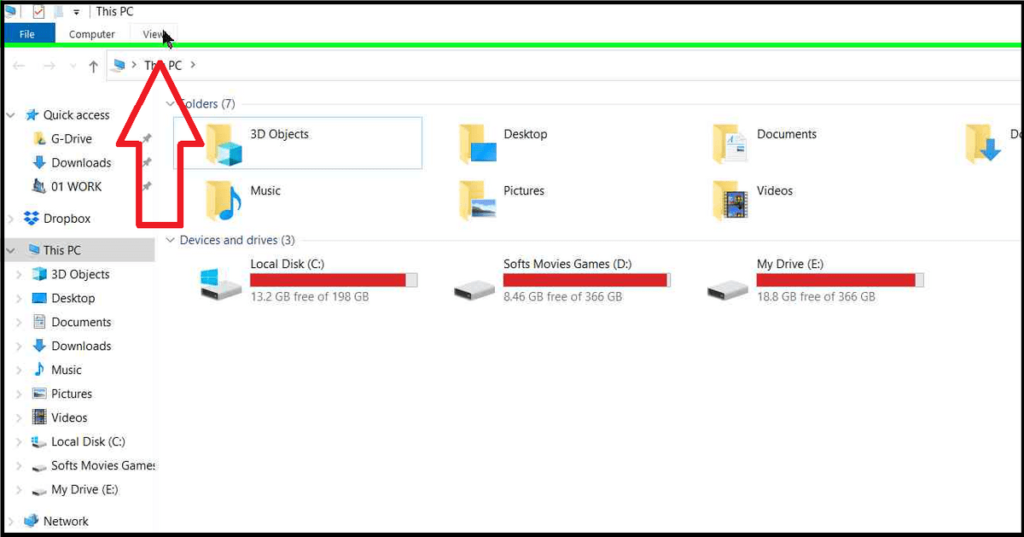
- Here you will find several options, including the Item Check Boxes option on the right.
This feature by Windows makes my work easier while selecting multiple items. I don’t have to use my left hand to hold the CTRL button.
Also, read How you can control the mouse cursor by using the keyboard and How to switch mouse buttons.
I hope you understand How to Use Check Box to Select Files and Folders in Windows 10. If you have any queries, you can comment below.

1 thought on “How to Use Check Box to Select Files and Folders in Windows 10”