We all know that Windows lets us capture screenshots of the entire screen. But, do you know How to Take A Partial Screenshot on Windows of a Specific Area? Here we have provided 3 methods by which you can Take Partial Screenshot of a Specific area on Windows Operating System. Check out all three methods and follow the one that looks easy for you. I personally like Method 2 and use it most of the time.
We take a lot of screenshots on our Mobile simply by swiping the palm, holding the volume button, or using other methods. But, Windows has introduced the Screenshot feature a long time ago. However, sometimes, we just want to capture a specific area of the screen. So, here we have a few methods with step-by-step guides to show you How to Take A Partial Screenshot on Windows 10, Windows 11, Windows 7, or any other version after Windows XP.
Table of Contents
How to Take A Partial Screenshot on Windows:
Method 1: Print Screen Key
I am not sure if you are aware or not, there is a Print Screen button on your keyboard. On different keyboards, it is printed differently like Prt Scrn, PrtSc, Prt Scr, etc.
When you hit the button, Windows captures the Screenshot of your entire desktop and saves it in the clipboard. But, we want Partial Screenshot. For, that follow the below steps.
Windows Screenshot Key Not Working:
Before we proceed, I want to answer the most common issue faced by Windows users. Some users say Windows Screenshot Key is not working, or it is not capturing the screenshot.
Well, in the latest update of Windows, things have changed a little bit. If you are not able to take a Screenshot by using the Prnt Scrn button, then try the combination Win Key + Prnt Scrn. It will definitely work.

However, on some laptops and keyboards, the Prnt Scrn button is set as a Secondary Key. In such cases, you should hold Fn + Win Key + Prt Scn together to capture the screenshot.
How to Capture a Window with Prnt Scr?
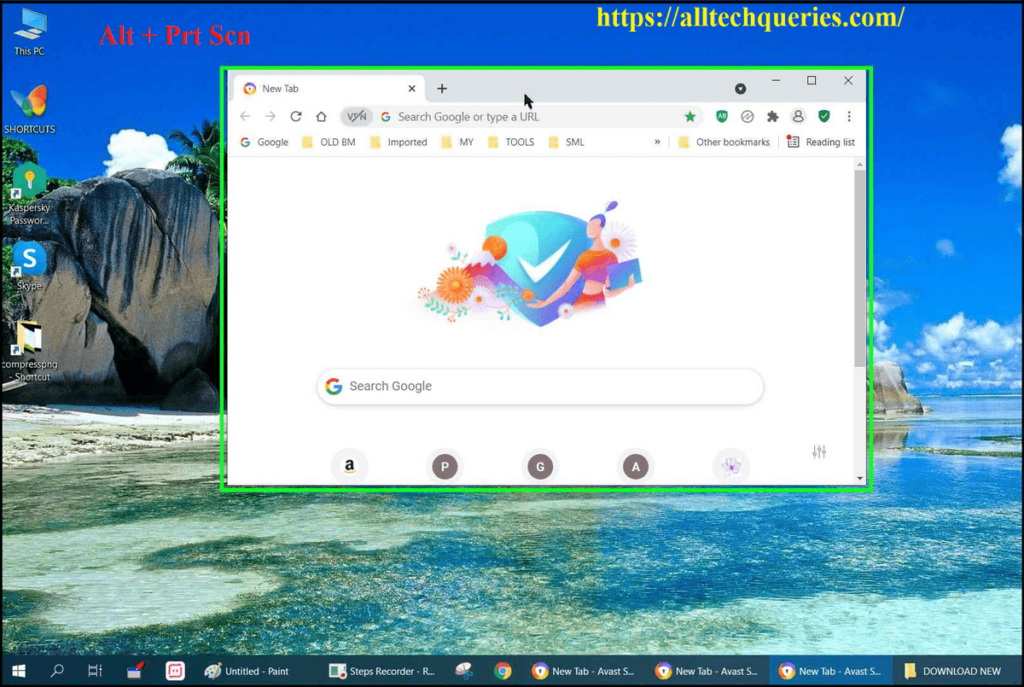
Here is a bonus for you. You can use the keyboard shortcut Alt + Prnt Scrn to capture the active window. or Fn + Alt + Prnt Scrn, if you are using a Laptop.
Print Screen Key:
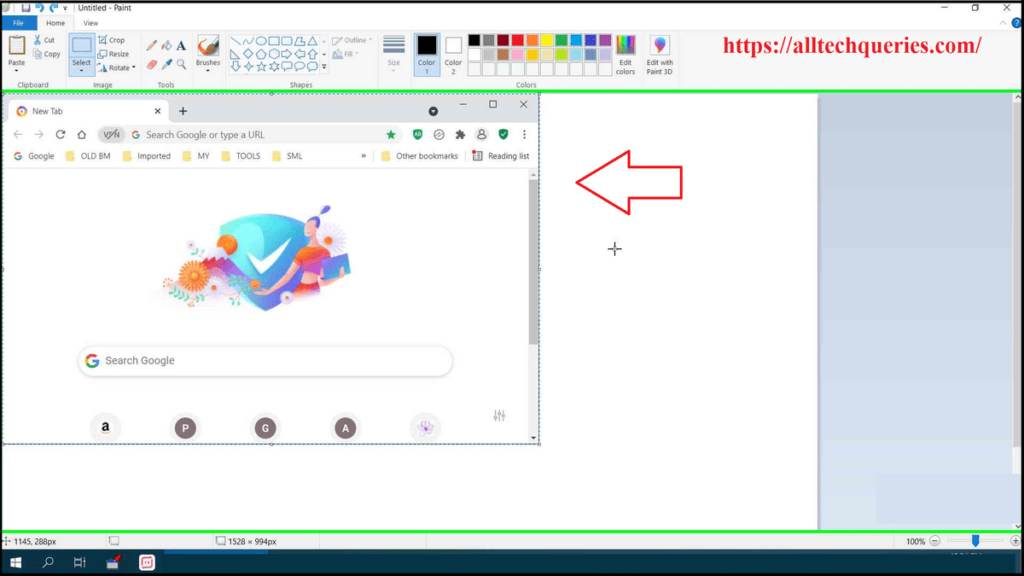
So, let’s continue where we left off. By using the keyboard shortcut, you captured the screenshot. However, it will capture the entire screen and save it in the clipboard. So, How to Take A Partial Screenshot on Windows by using it?
- Open Paint application from Search Bar or Start Menu.
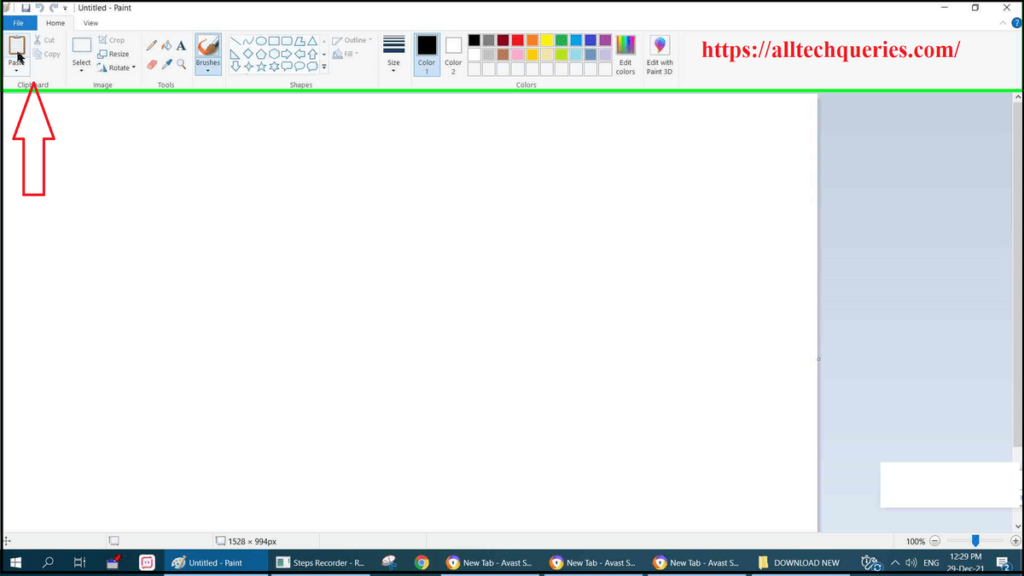
- Paste the screenshot from Clipboard by using Keyboard Shortcut CTRL + V or using the Paste tool.
(Check out All CTRL Keyboard Shortcuts)
- Now you can crop the required area by using the Selection Tool.
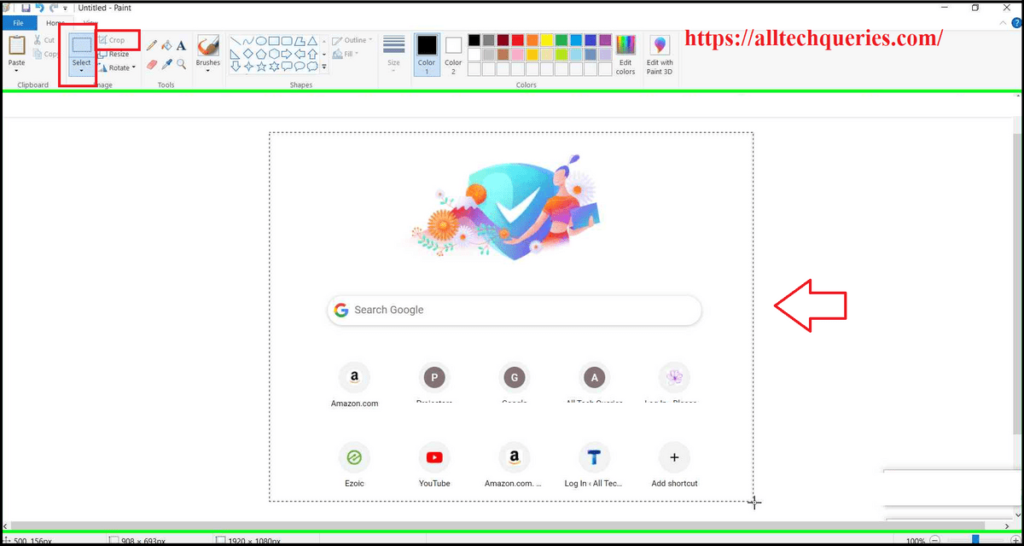
- Finally, click on Save, and save the screenshot in your desired location.
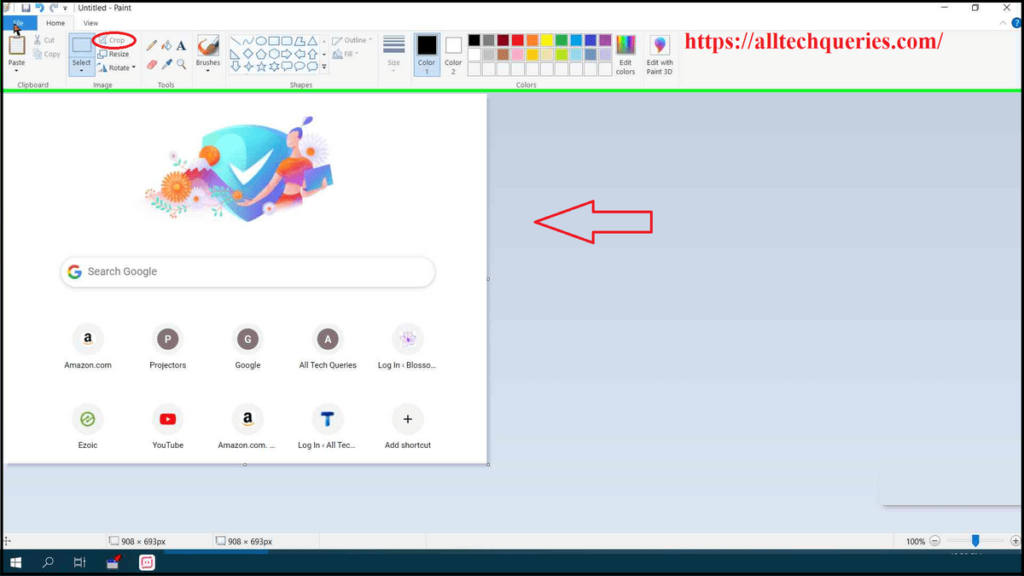
It is the oldest method by which you can Take Partial Screenshot on Windows. Let’s check the latest methods as well.
Method 2: Snipping Tool:
It is the easiest and quickest way of Taking Partial Screenshots on Windows. I personally like it because it is suitable for new users as well as advanced users.
How to Take A Partial Screenshot on Windows using Snipping Tool:
It is better if you Pin the Snipping Tool to your Taskbar as I did.
- Open the screen you want to capture.

- Launch the Snipping Tool (from Taskbar, or Start Menu, or by using Windows Search bar)
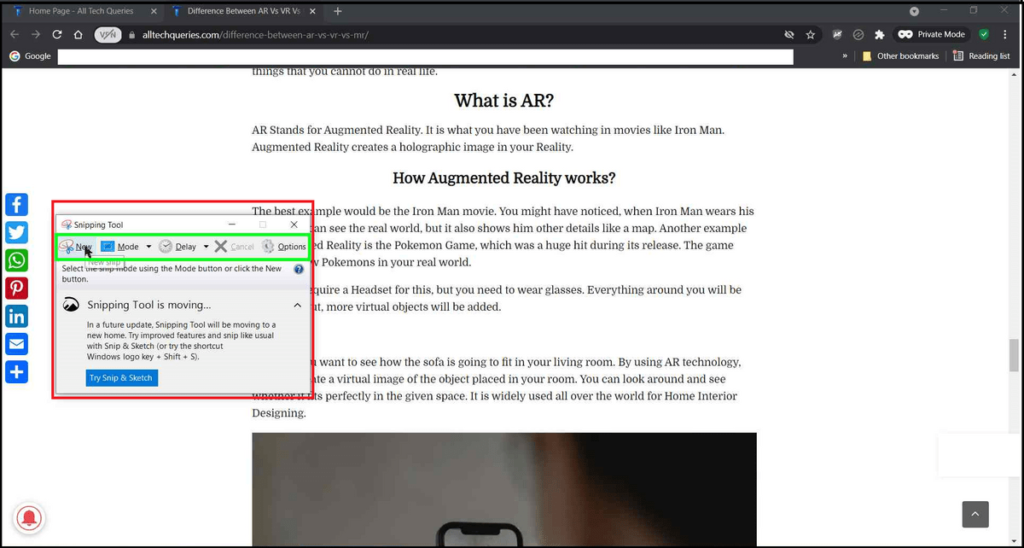
- Click on the New button, and you will get a Crosshair by which you can select the area you want to capture.
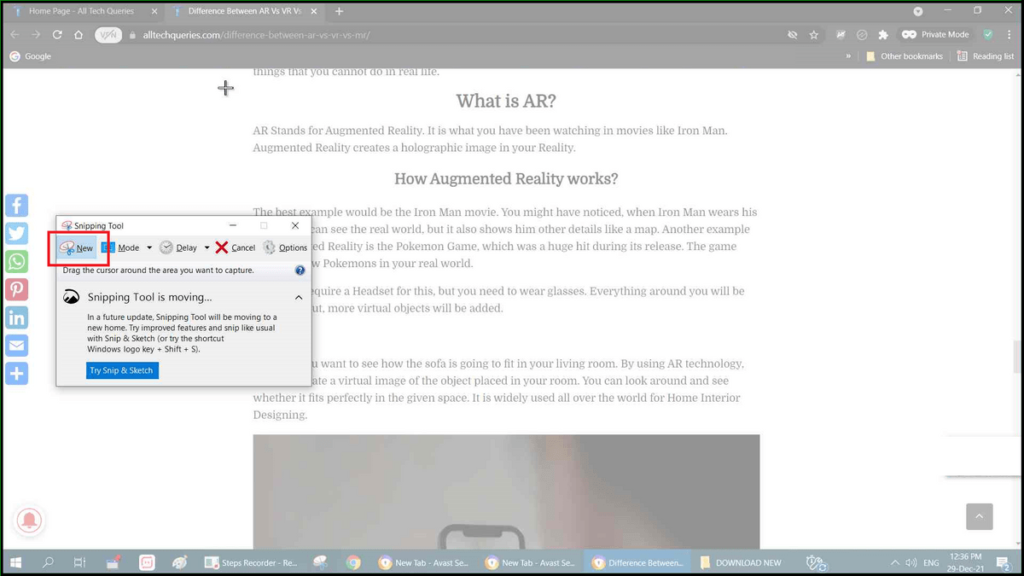
- It will then open up a window with the screenshot. Here you can add additional information by using the Pen tool and Marker tool.
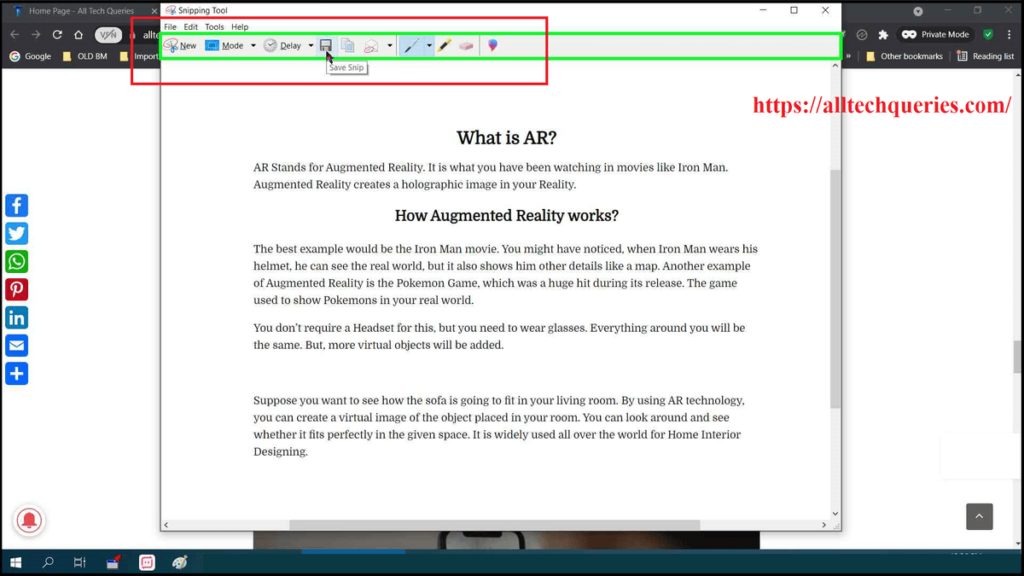
- Finally, you can either copy it to the clipboard or save it as an image. You can also choose to save it in PNG, JPG, MHT, or GIF format.
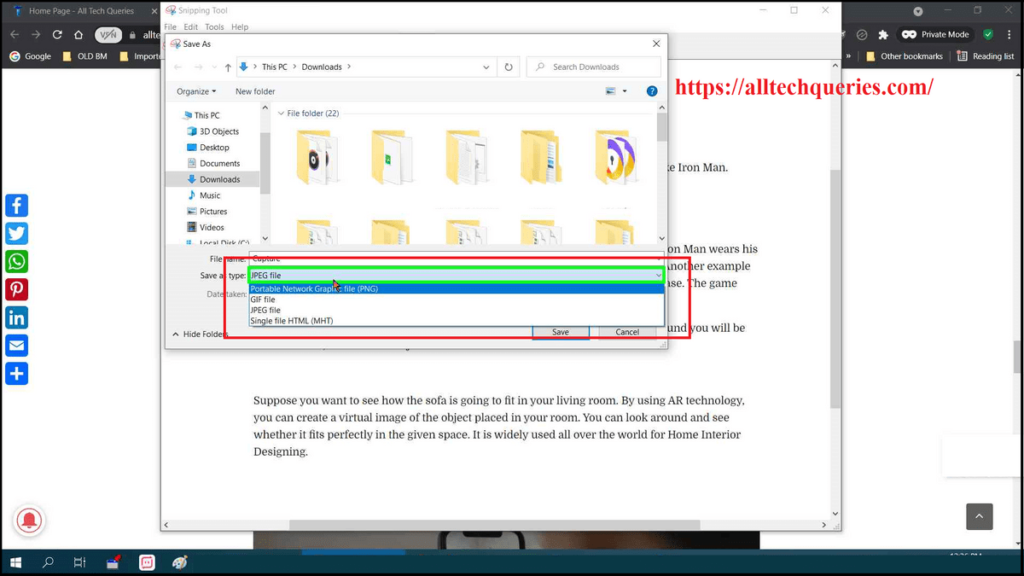
It is the quickest way of capturing a screenshot.
More Options:
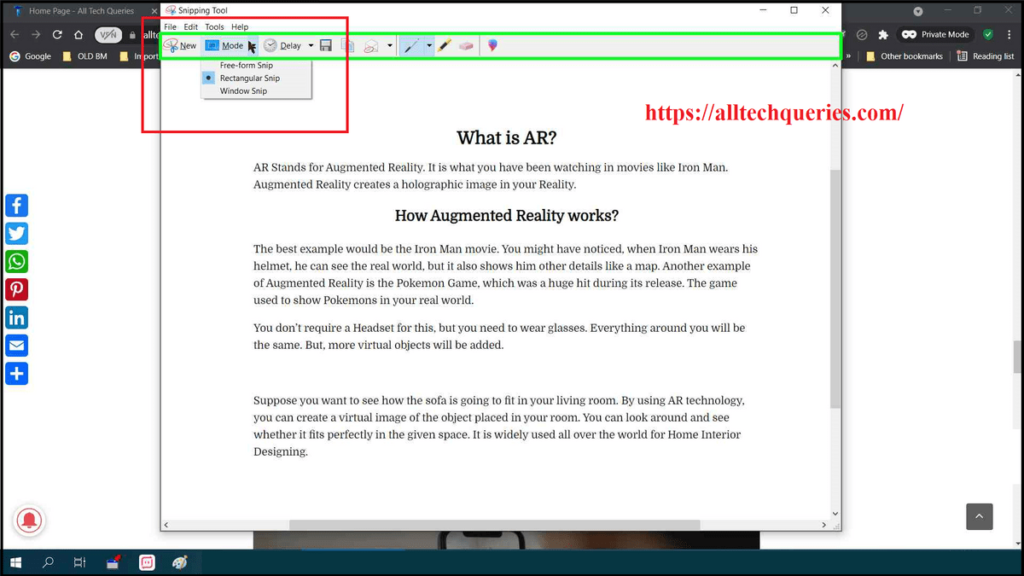
There is a Mode option in the Snipping Tool toolbar. You can change the Capture Mode to Window Snip, Rectangular Snip, or Free Form Snip. Moreover, you can even delay the Screen Capture after you click the Button. It is very useful in certain situations.
Method 3: Snip & Sketch Tool:
Here is the advanced version of the Snipping Tool called Snip & Sketch. You can launch it by using the same method as we described above. Or, you can quick-launch it by using the keyboard shortcut Win + Shift + S.
- As soon as you hit the Keyboard Shortcut Win + Shift + S, your screen will turn dull, your cursor will turn into a crosshair, and you will see a small toolbar on top of the screen.
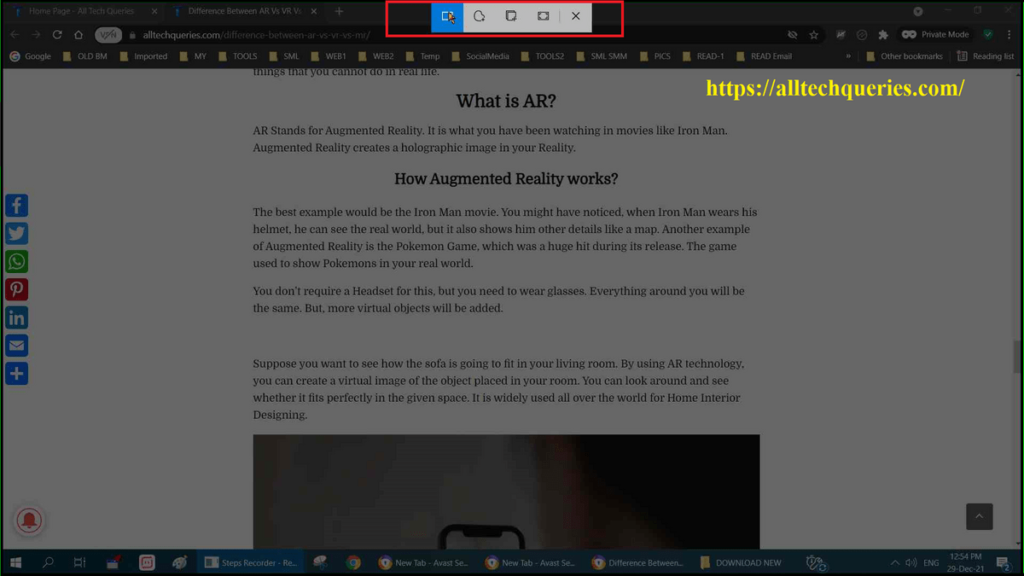
- By default, it is set to Rectangular Snip. But, by using the above toolbar, you can change it to Window Snip, Free Form Snip, or Full-Screen Snip.
- Simply use the crosshair to select the required area, and it will be saved to the clipboard.
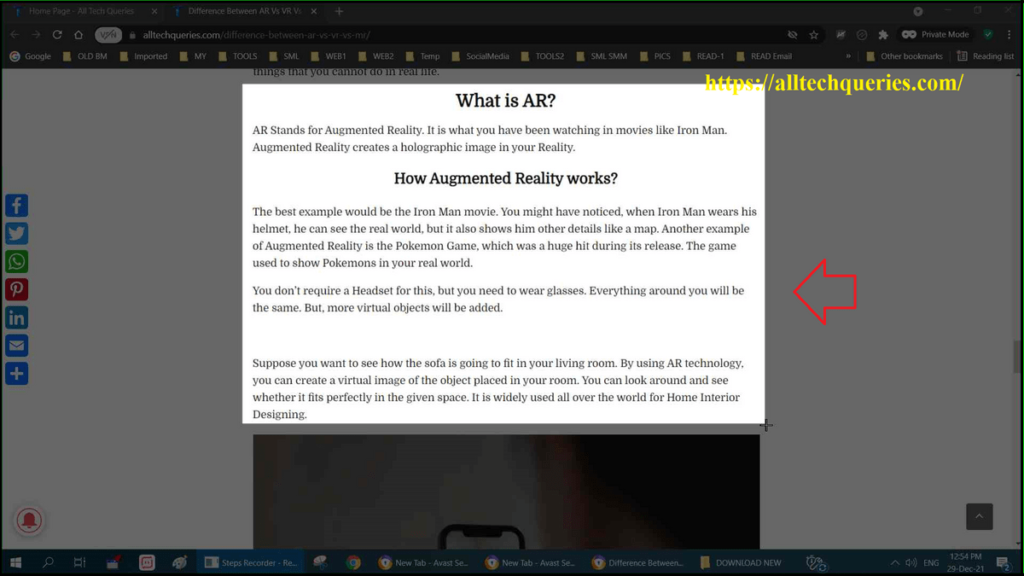
- You can then paste it in the Paint and Save the image to your hard disk. Or, you can immediately click on the Windows Notification to open the Snip & Sketch window.

- Here you can edit the image by using pen, pencil, and market tools. You can even crop the image more by using the Crop tool.

- After you are done, you can copy, share, print, or save it in JPG, PNG, or GIF image format.

So, here are the three methods that will guide you on How to Take A Partial Screenshot on Windows of a Specific area.
Conclusion:
The screenshot feature on Windows is very useful if you know how to use it. You can capture the online payment receipt, any important information on the internet, and more. Even I use the screenshot tools every day to capture the screenshots you see above.
You can use any of the three methods, whichever you think is easy and convenient. These guides on How to Take A Partial Screenshot on Windows of a Specific Area works on Windows 11, Windows 10, Windows 8, and Windows 7 PC. The Prnt Screen option is even available in Windows XP.

