Since Windows XP, Microsoft has added a feature called Screensaver. The screensaver is activated when your computer is idle for a few minutes. The Screensaver Setting is still featured in Windows 10, but the settings are hard to find. So, many people keep asking How to Change the Screensaver on Windows 10.
Therefore, we have decided to make a step-by-step tutorial and show you How to Turn on Screensaver, How to Turn off Screensaver, and How to Change Screensaver on Windows 10 easily.
You can also check out How to Customize Icons on Windows 10.
Table of Contents
How to Change Screensaver on Windows 10:
Here is a step-by-step tutorial on How to Change Screensaver on Windows 10.
- First, Right Click on Desktop & click on the Personalize option.

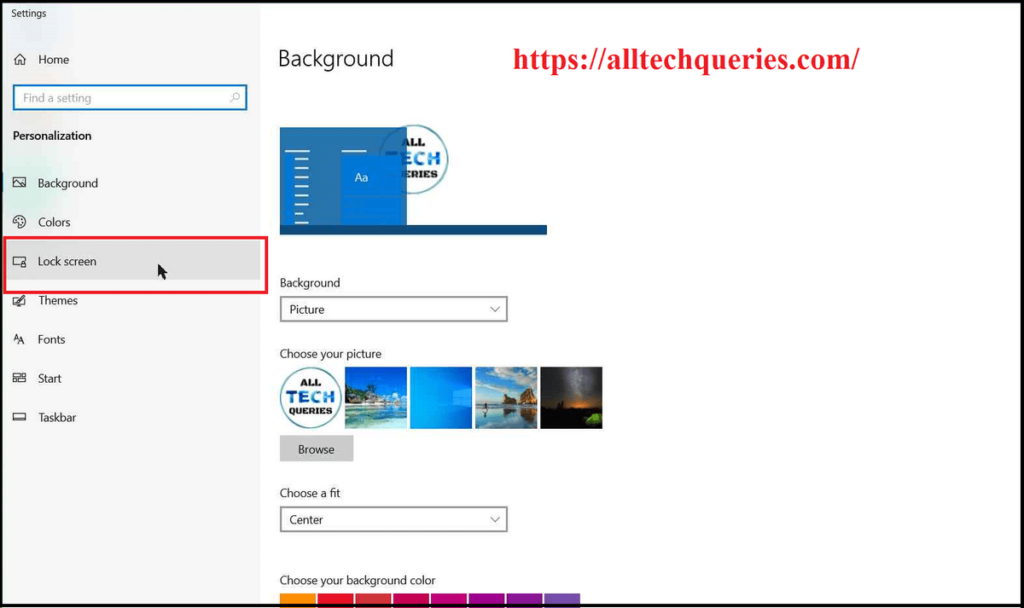
- Now click on the Lock Screen option on the left section.
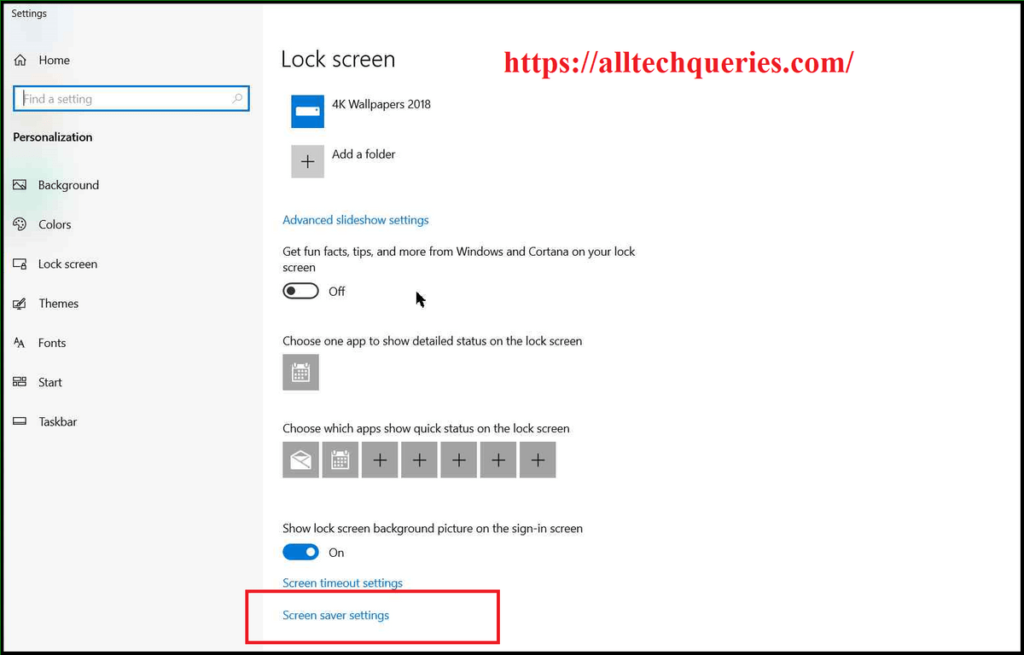
- Scroll Down till you find the Screen Saver Settings option.
- Upon clicking on it, you will get a small window.
- You can click on the drop-down menu to see what you can keep as Screensaver on Windows 10.
- You will get options like
- None
- 3D Text
- Blank
- Bubbles
- Mystify
- Photos
- Ribbon
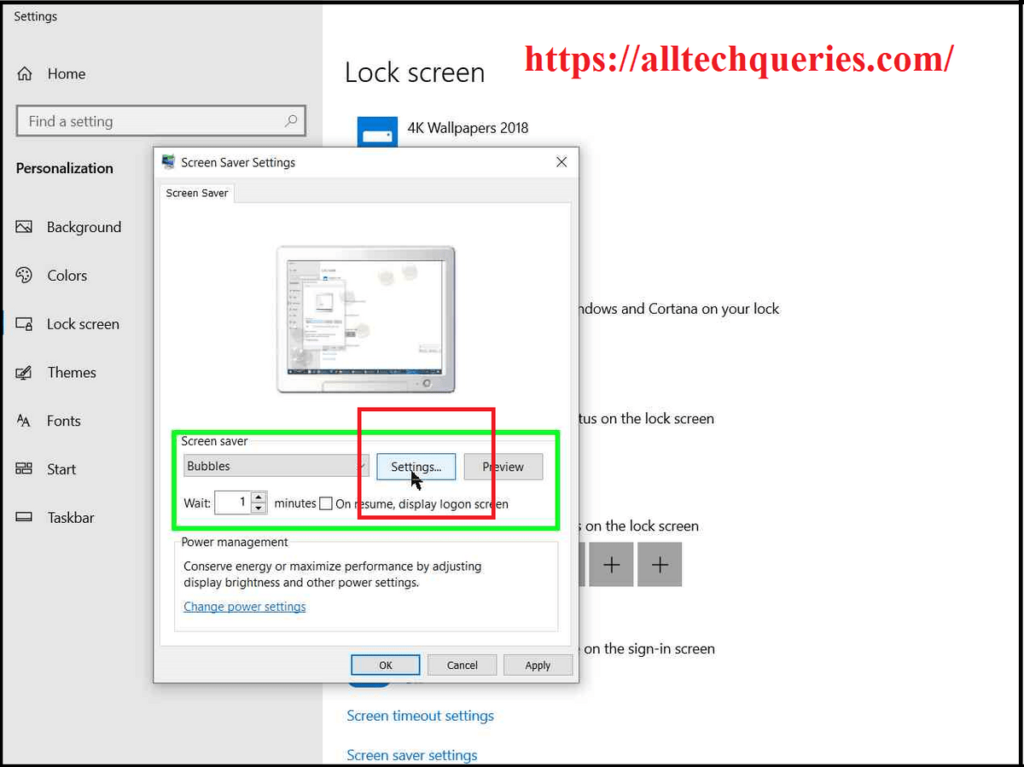
- To Turn On Screensaver or Change Screensaver, select an option from the Drop-Down menu. You can also change the settings as per your requirements.
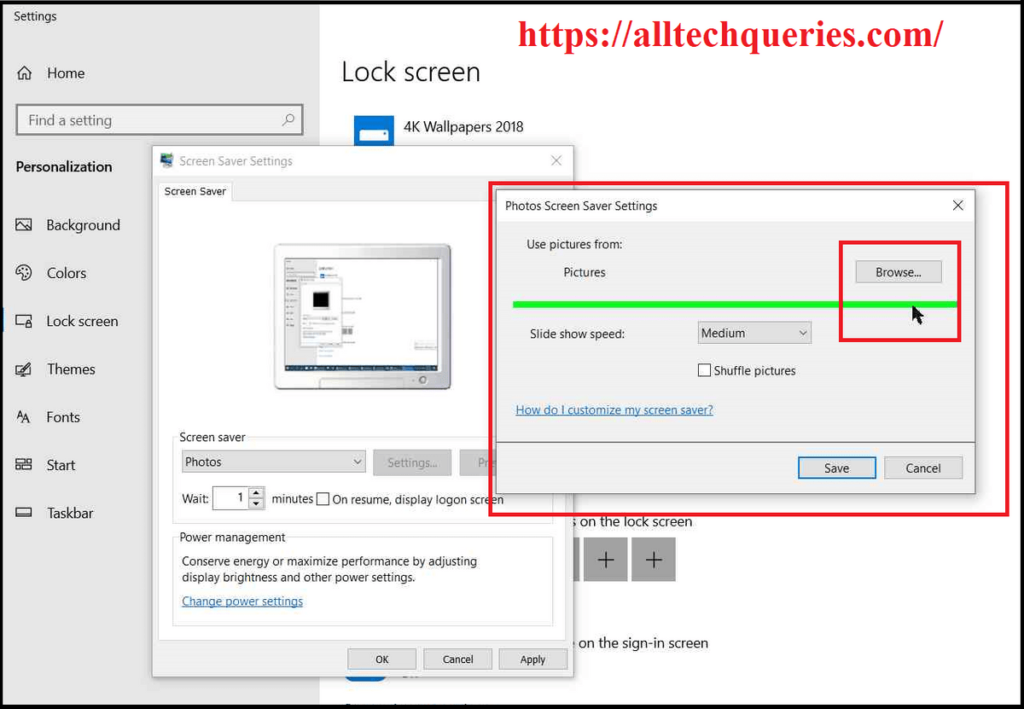
- Finally, click on Apply and Ok to Change the Screensaver.
How to Turn off Screensaver in Windows 10?
- In the same window (as we discussed in the above method) You should choose the option None to Turn Off Screensaver feature.
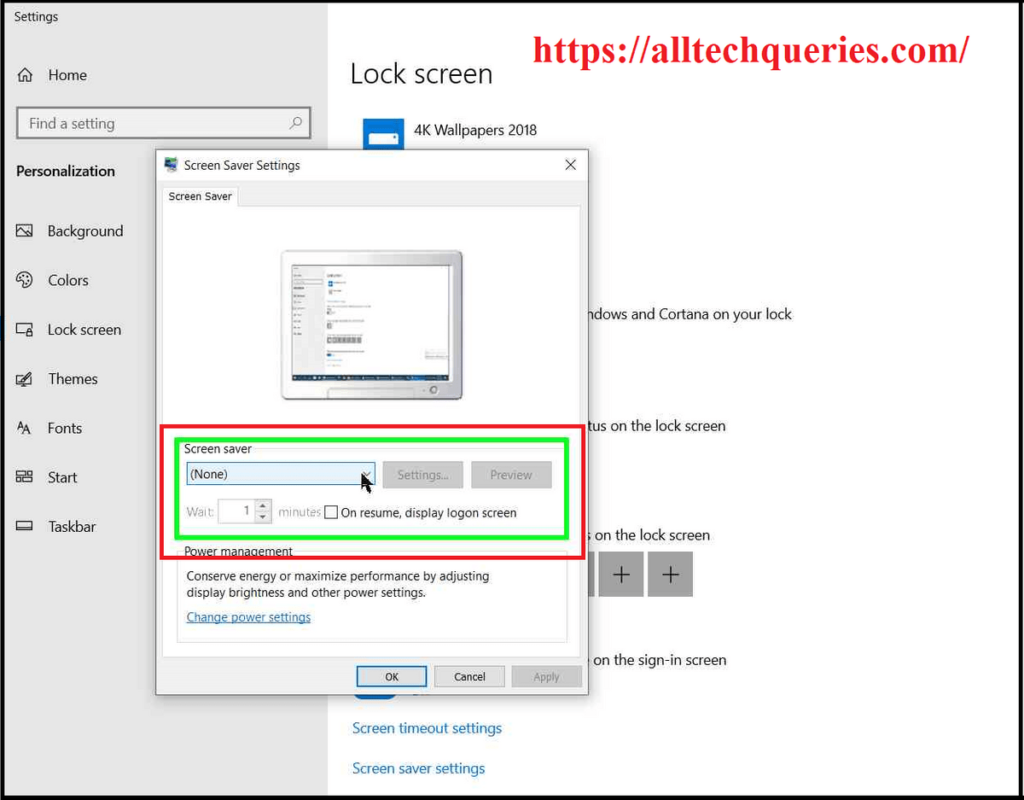
- Then click on Apply & Ok to save the effect.
Final Words:
With this guide, you can learn How to Turn on Screensaver, How to Turn off Screensaver, and How to Change Screensaver on Windows 10. If you have any other issues regarding Windows Screensaver or other Technical Queries, feel free to Contact Us using the Contact Us form.

