Here is a tutorial on How to Change Margins In Google Docs.
One of the best things about Google Docs is that you can customize your document as per your needs. And, one of those customization options is to adjust the Margins of the document. However, some people are having difficulty doing that. Therefore, we have bought a step-by-step tutorial on How to Change Margins In Google Docs using 2 Methods.
Table of Contents
How to Change Margins In Google Docs?
Method 1:
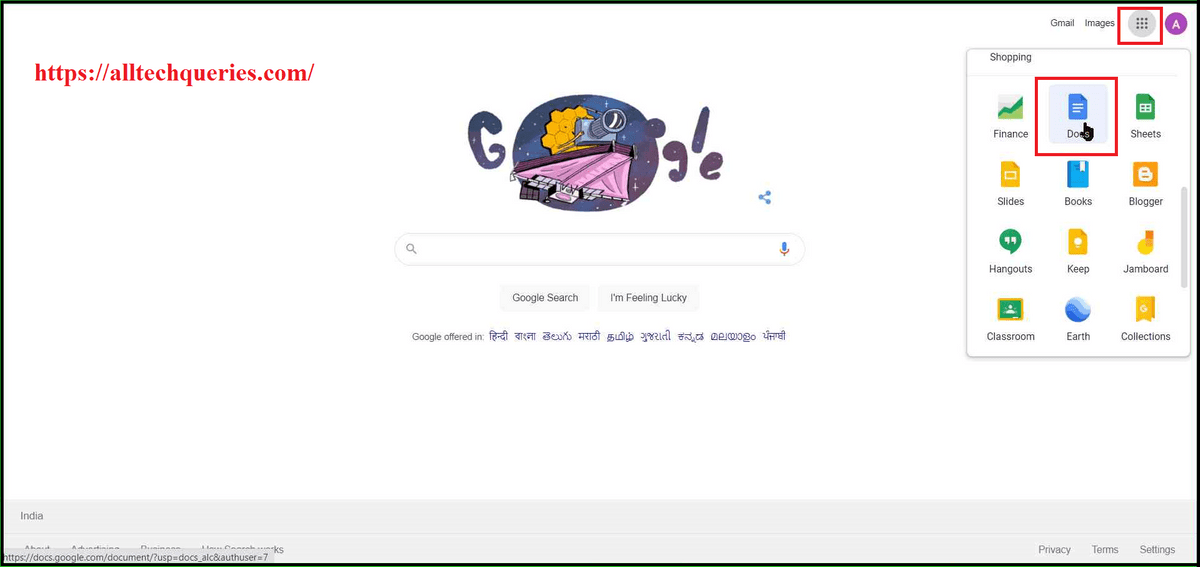
- Open Google Docs.
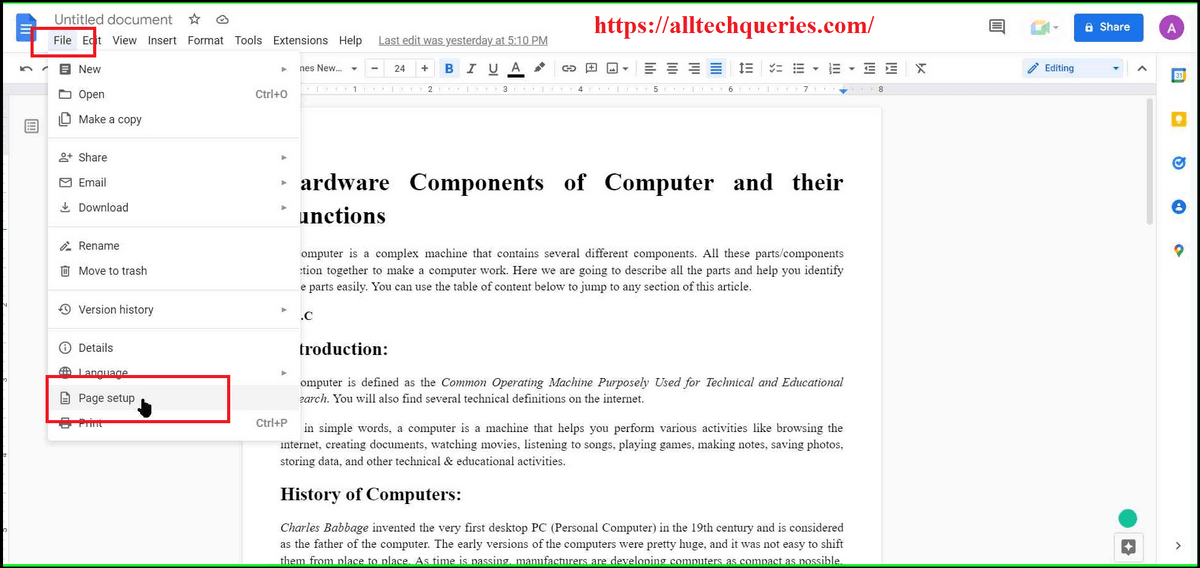
- Go to File Menu, and select the option Page Setup.
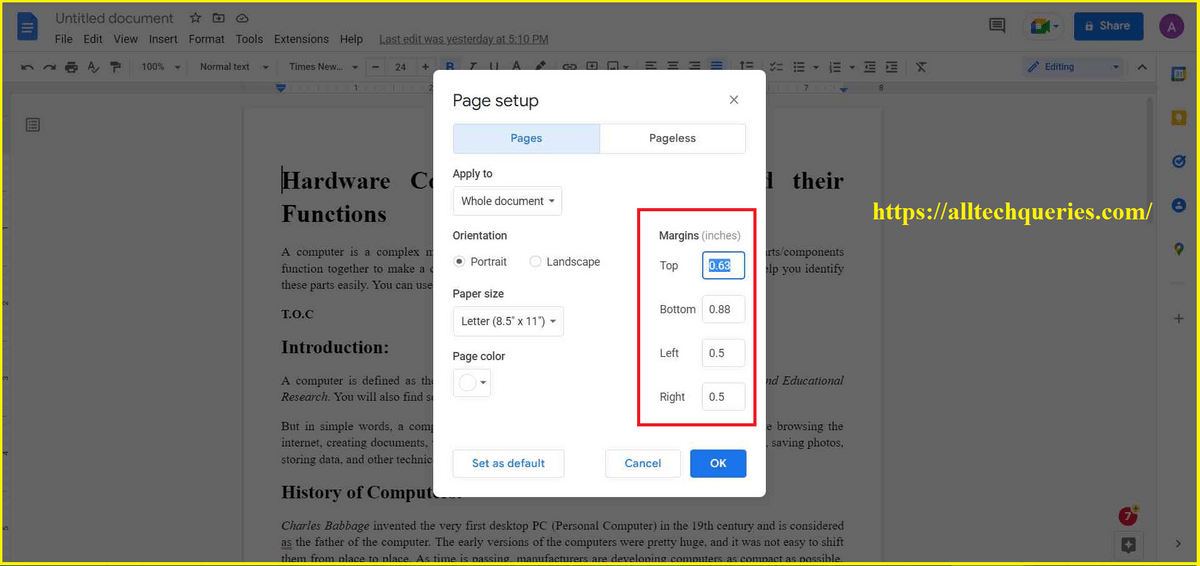
- Here, you can see the Margins option. You need to enter values based on How many inches of Margin you want to add on the Top, Bottom, Left, and Right.
- Then click on OK.
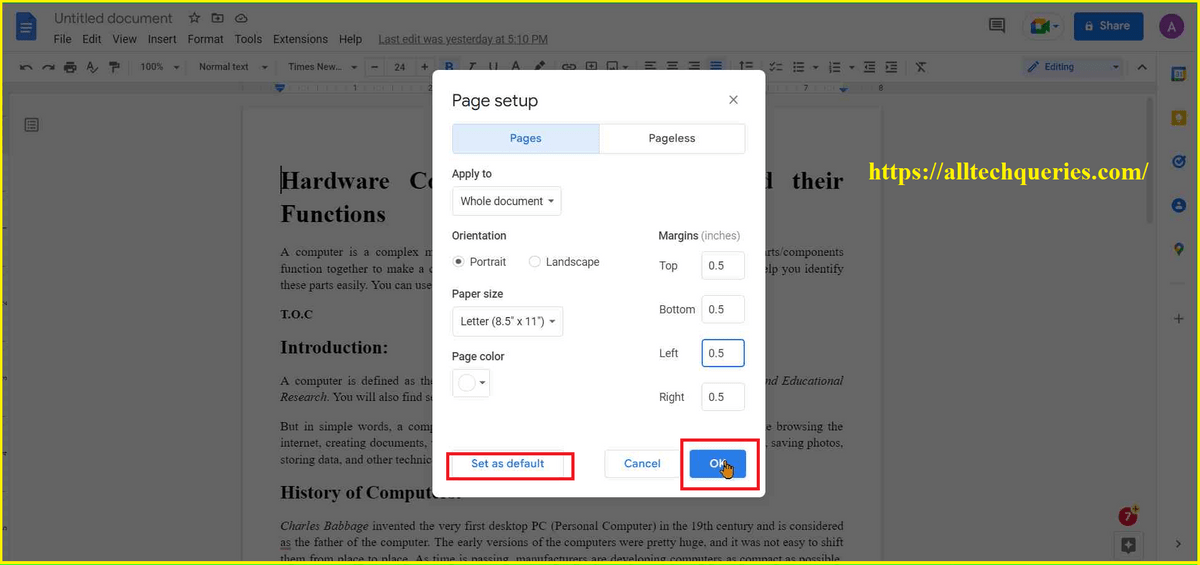
If you click on the Set as Default option, all your new documents will have the same measurement of Margins.
Note: There is no option to reset the Margins. Therefore, make sure you note down the previous margin values before changing them.
You can also watch the below video.
You can also check out How to Make One Page Landscape in Google Docs.
Method 2:
For this, you need to enable the Ruler in your Document
How to Show/Hide Ruler in Google Docs?
- Go to View Menu
- Click on Show Ruler. (A check mark will appear beside the option indicating that the feature is Enabled).
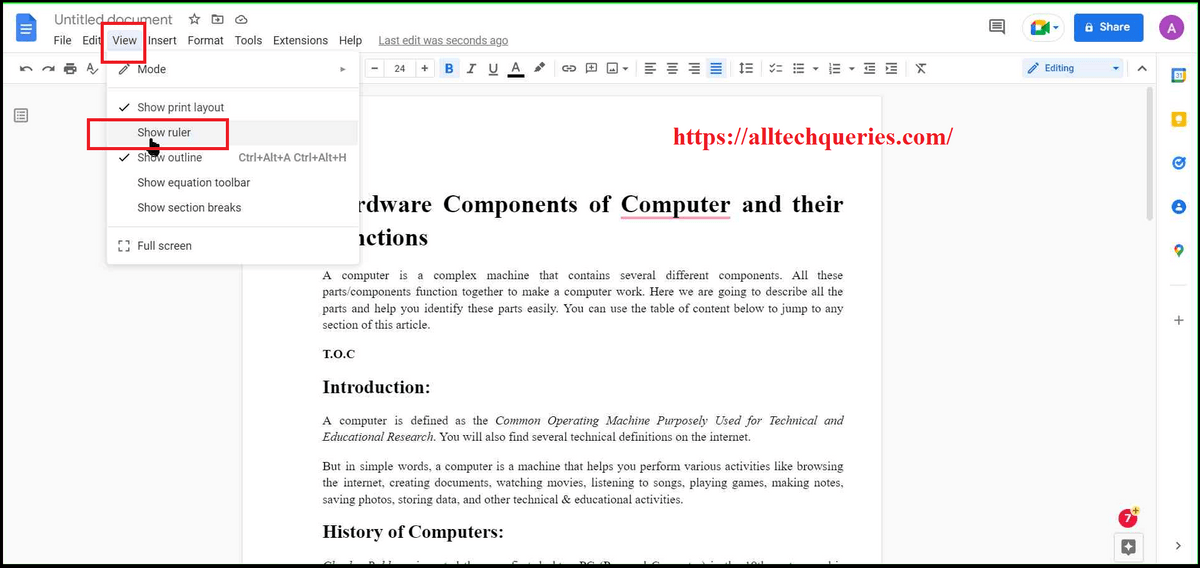
- Similarly, clicking on the same option again will Disable or Hide the Ruler.
Using the Ruler:
In this 2nd Method, we are going to use the Ruler to show you How to Change Margins in Google Docs.
- There are two Rulers, Vertical and Horizontal.
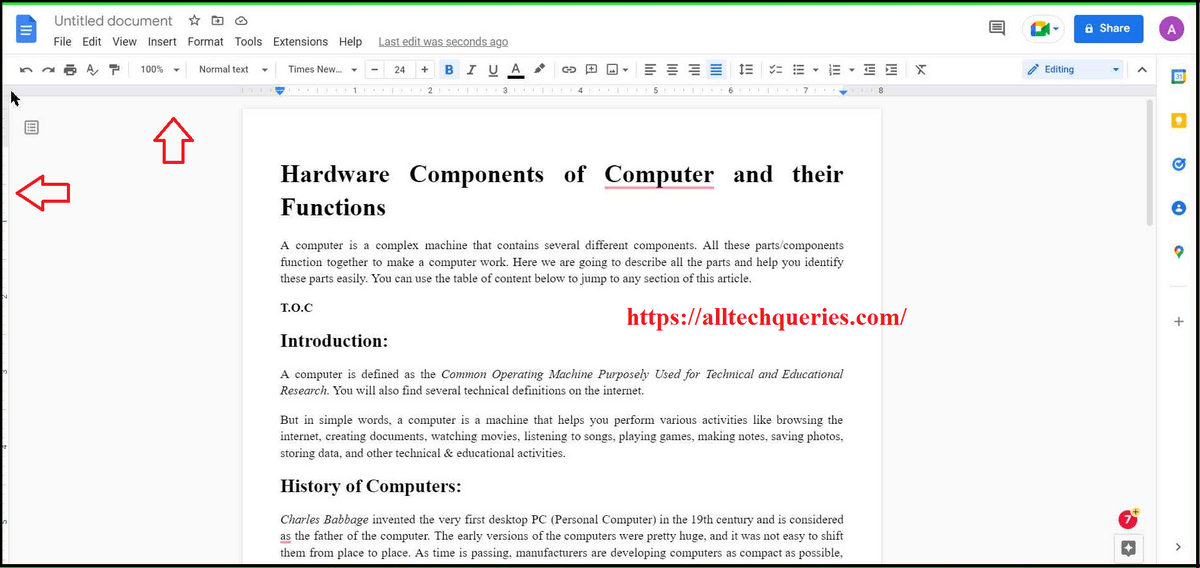
- The Vertical Ruler helps you adjust the Top and Bottom Margins. It is located on the left side of the document.
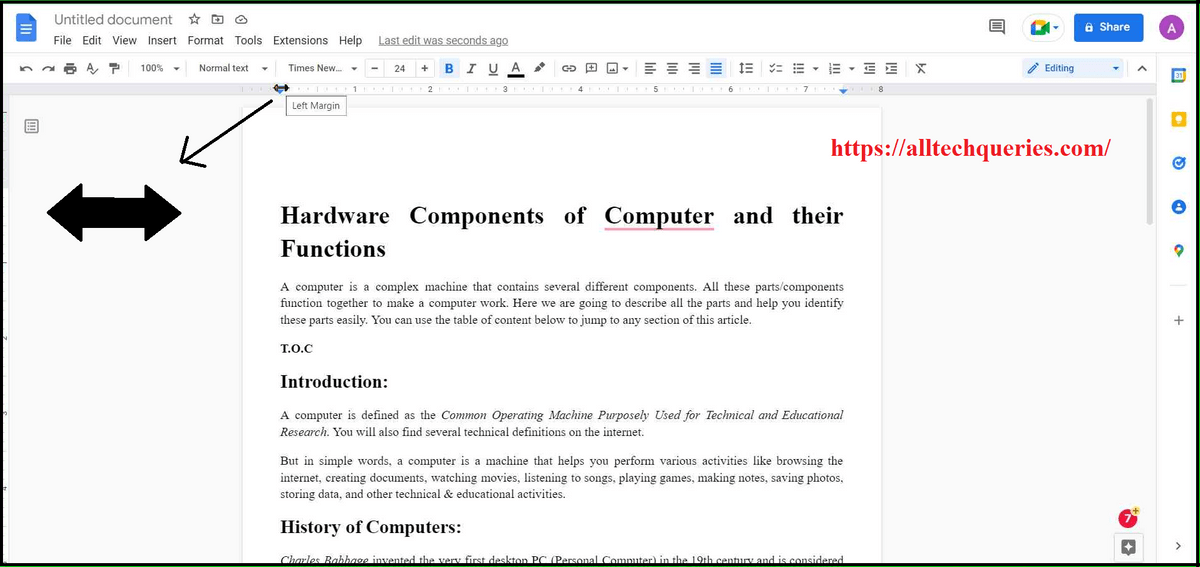
- The Horizontal Ruler helps you adjust the Left and Right Margins. It is located at the top of the document (below the toolbar).
The Rulers are White in Color. And the Margins are indicated with grey color on the Ruler.
- If you move your cursor on the intersection point, your cursor pointer will turn into a double arrow pointer.
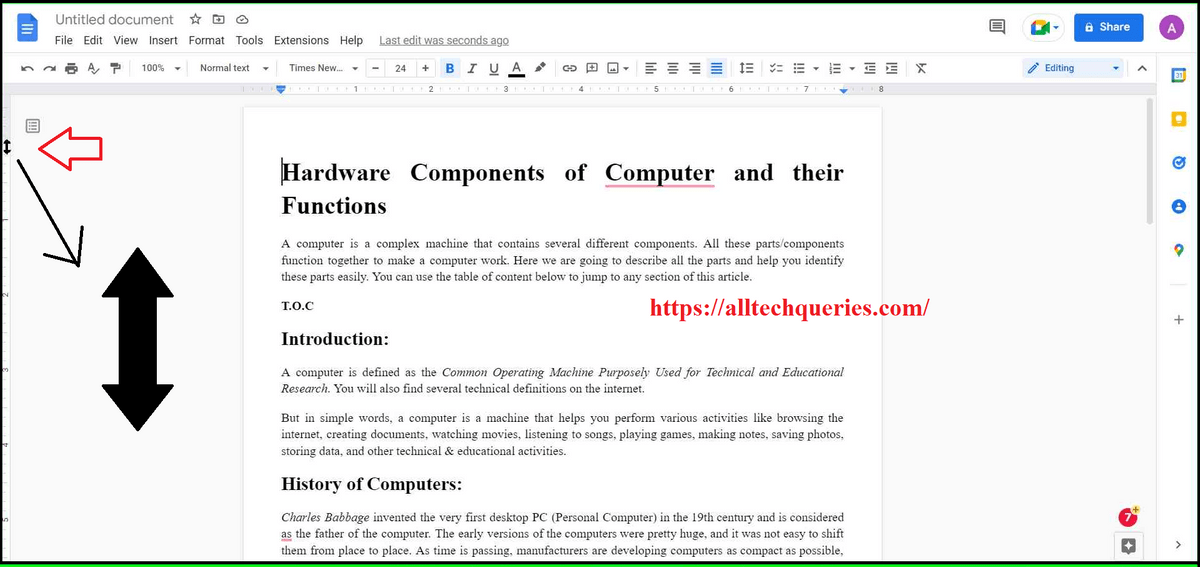
- You need to click and drag the grey section to increase or decrease the Margins (as shown in the picture).
Also, check out How to Add Page Numbers In Google Docs.
Indents:
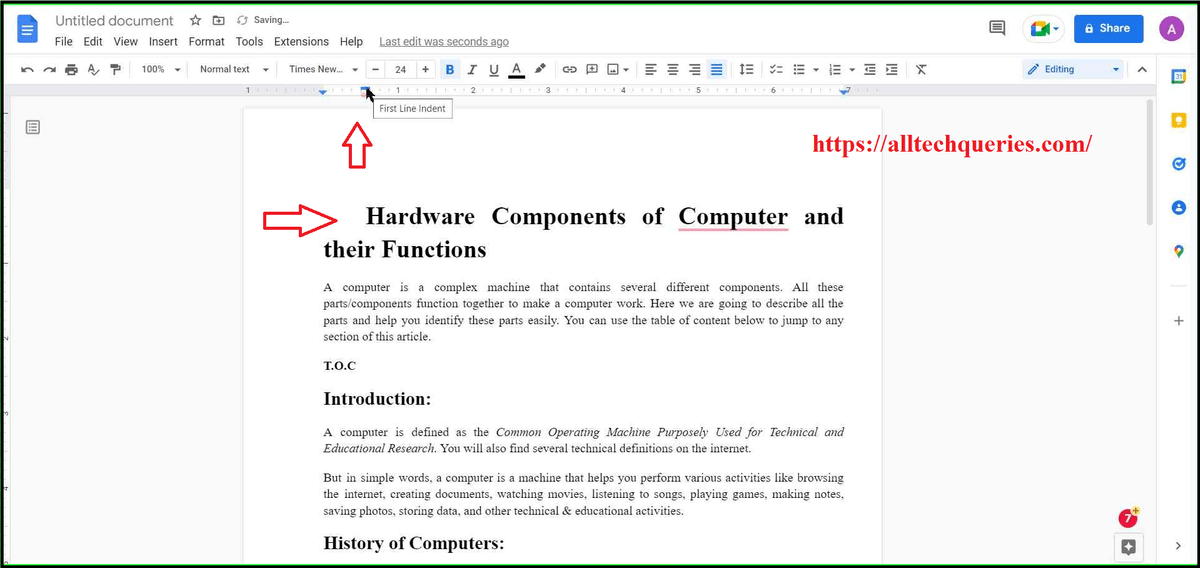
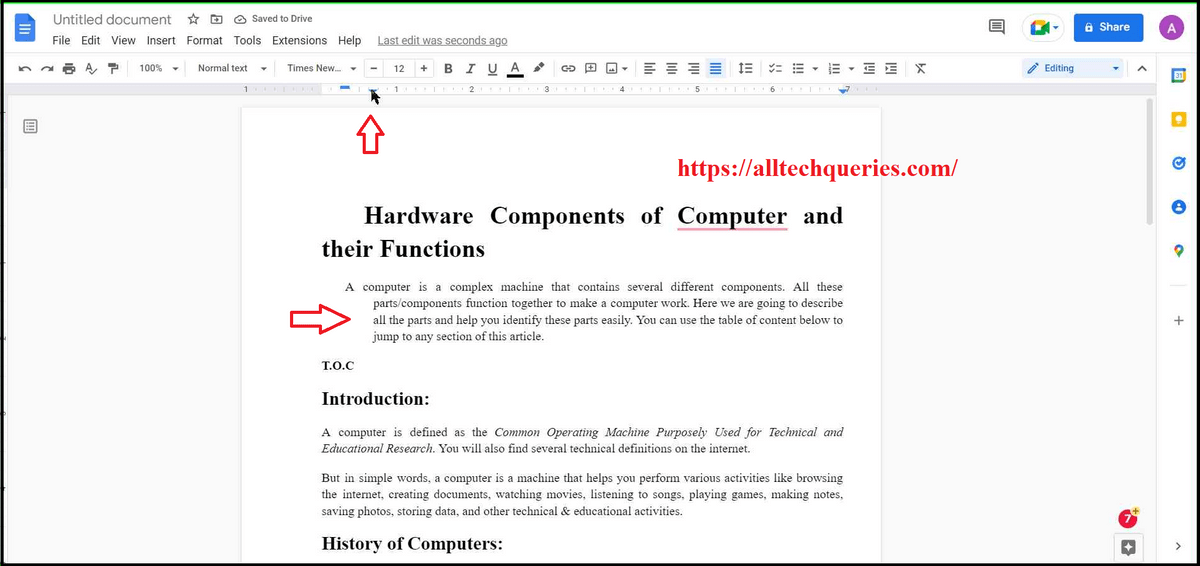
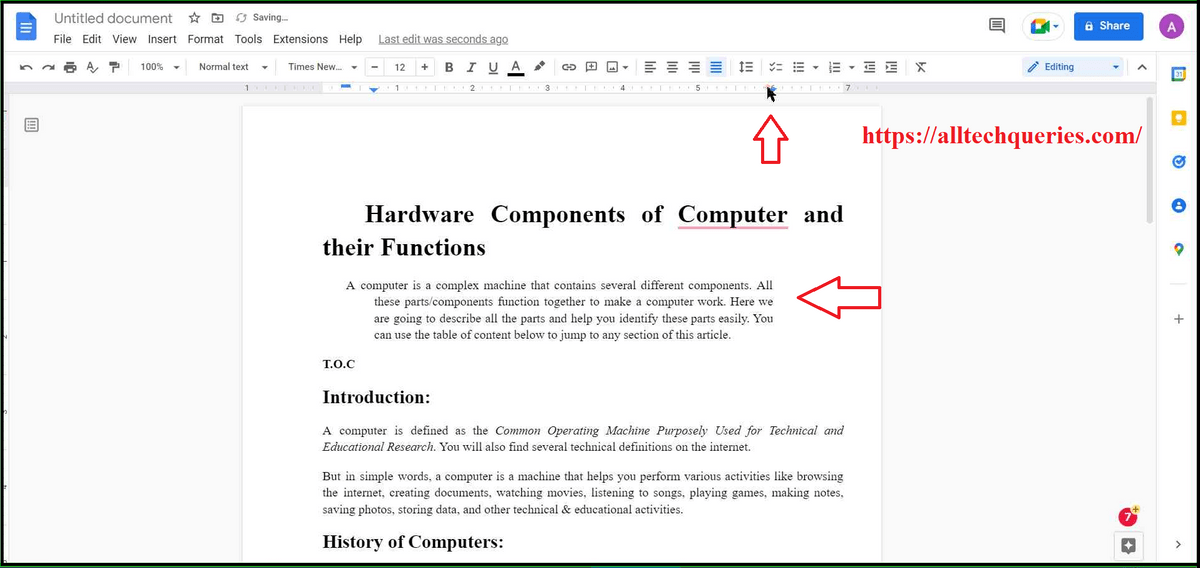
You will notice some more objects on the Horizontal Ruler. The Rectangle icon indicates the First Line Indent, the inverted triangle on the left indicates the Left Indent, and the inverted triangle on the right indicates the Right Indent.
First Line Indent: You can adjust the distance of the First Line of a Headline or Paragraph using the First Line Indent.
Left Indent: You can adjust the left side distance of all other lines in a Paragraph or Headline using the Left Indent.
Right Indent: You can adjust the right side distance of a Headline or Paragraph using the Right Indent.
In this video, we have explained everything about the Ruler in Google Docs & MS Word, including How to Use Vertical Ruler & Horizontal Ruler, How to use First Line Indent, Left Indent, & Right Indent, and How to use Tab-Stop.
Conclusion:
Here we have provided two methods on How to Change Margins In Google Docs. In the first method, we enter precise values to adjust the Margins in Google Docs. On the other hand, we drag the Margins Bar to adjust the Margins manually. I personally like the second method because I can visually see the margins while adjusting. The first method is used by Professionals who want margins at an exact distance.
So, which method did you find more helpful? Comment below and let us know.

