Last Updated on May 31, 2022 by Tech Queries Team
There can be several occasions on which you wish to forward incoming emails to another account. In that case, you must learn How to Automatically Forward Emails in Gmail using the below guide.
This guide will help you receive future Emails to your new mail. However, if you want to transfer old Emails, you can check this article on How to Transfer Files from one Google Account to Another.
Suppose you are on a family trip, and you get business emails. You cannot hand over the Gmail password to any person, as it would risk your security. Instead, you can forward your incoming Emails to another Gmail account temporarily or permanently.
I will also tell you how much useful it is for me. So, whenever my readers comment on my articles or send me messages through the contact us page, I receive it on my professional Email ID (which is [email protected]).
However, when I am traveling or when I am not present in my office, I don’t usually check that Email. Hence, I have used the below method to forward emails on my regular Email (which I check frequently). Therefore, I can easily and quickly respond to my readers.
Not only that, previously, I used to transfer the Emails from my Boss to my personal Email so that I can respond to him faster.
Moreover, you get to choose whether you want to keep new mails on both Email accounts or only the new account, as per your convenience. You can also cancel the email forwarding.
Table of Contents
How to Automatically Forward Emails in Gmail:
So, here is an Easy Step-by-Step tutorial, which will help you Automatically Forward Emails in Gmail from one account to another.
- First, log into your old Gmail account.
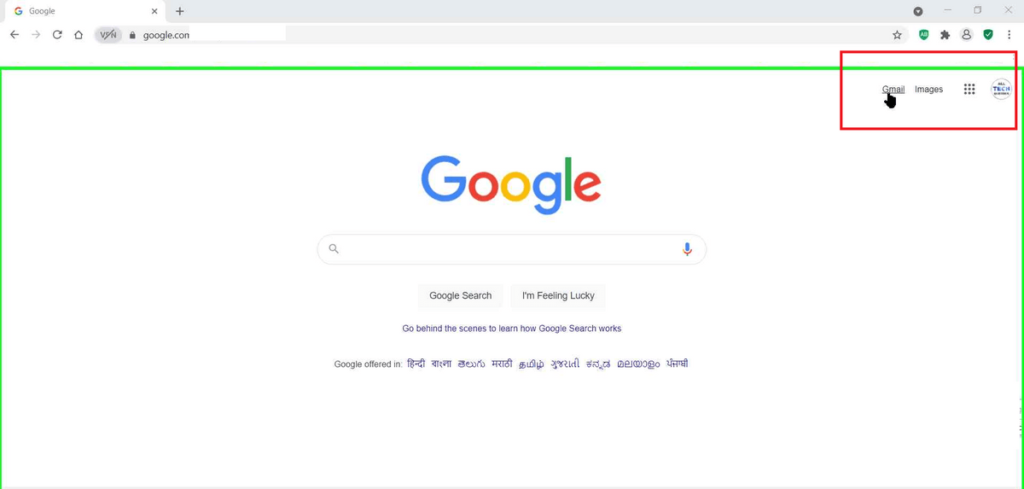
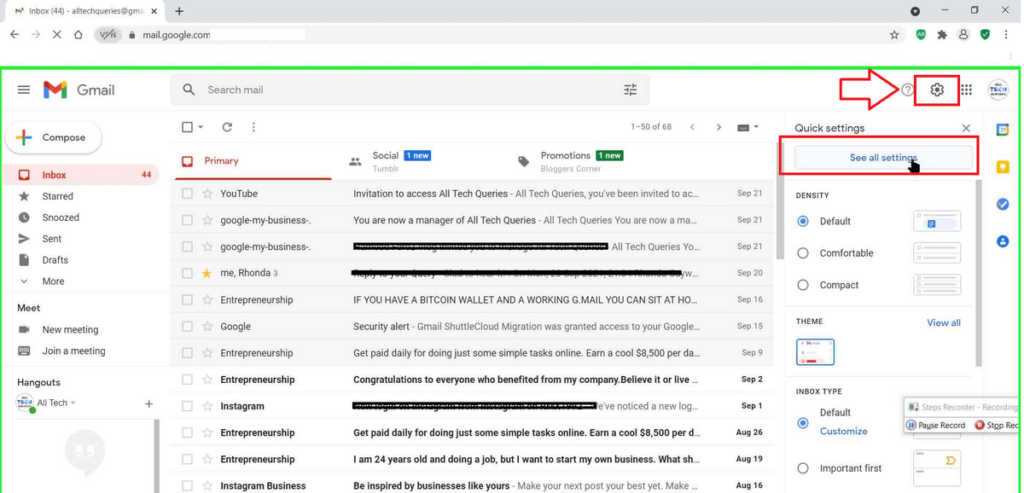
- Go to the Settings options as shown in the picture, and click on the See All Settings option.
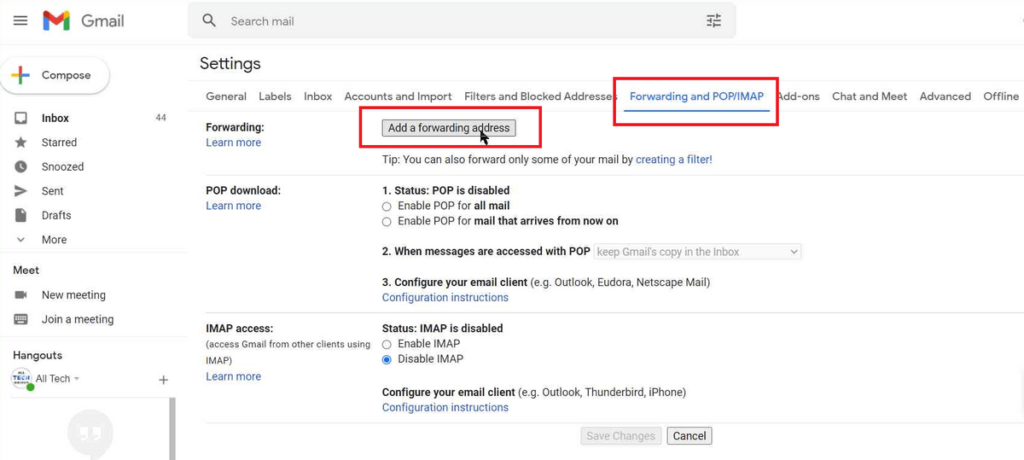
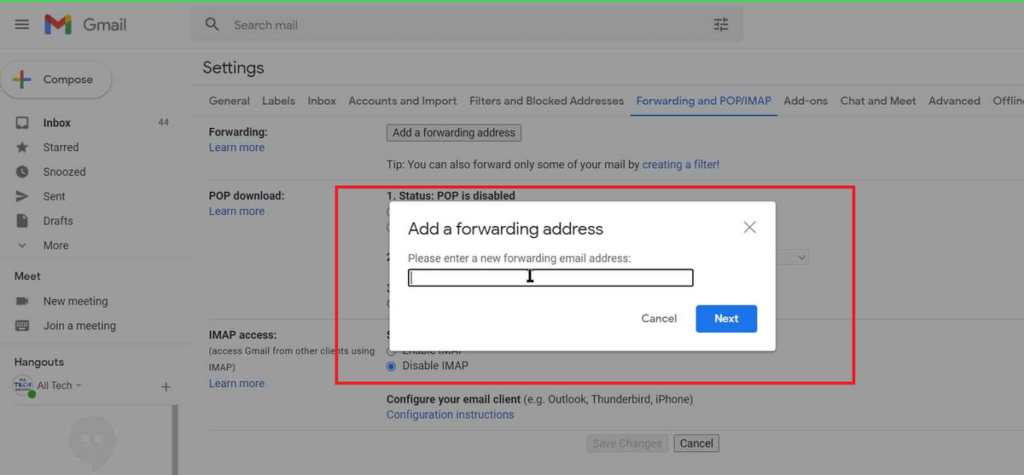
- Now, go to the Forwarding and POP/IMAP tab, and click on the Add a Forwarding Address button.
- Next, you need to enter the new Email Address and click on Next.
- Gmail will open up another window (But if it doesn’t appear, you might have to Disable the Popup Blocker)
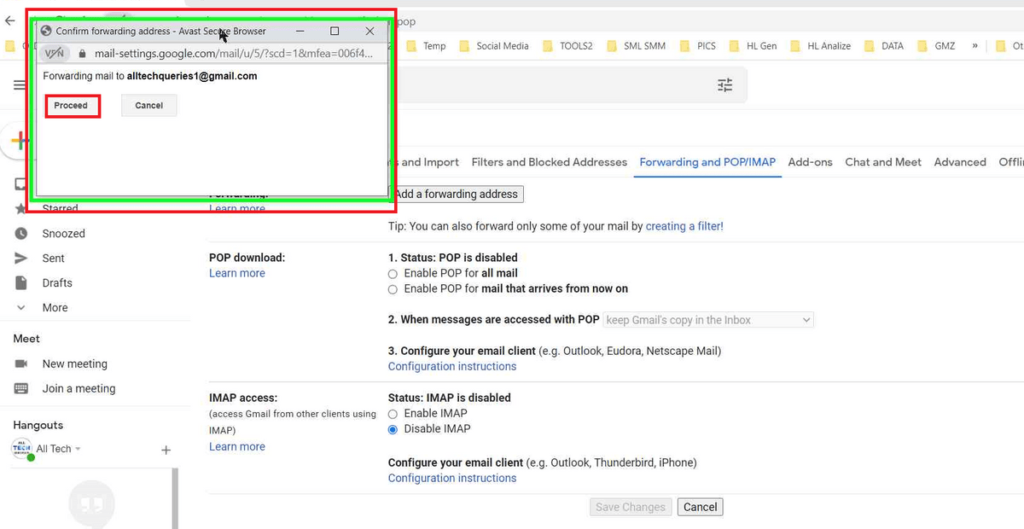
- Here, you need to confirm the Email Address and click on Proceed, then OK
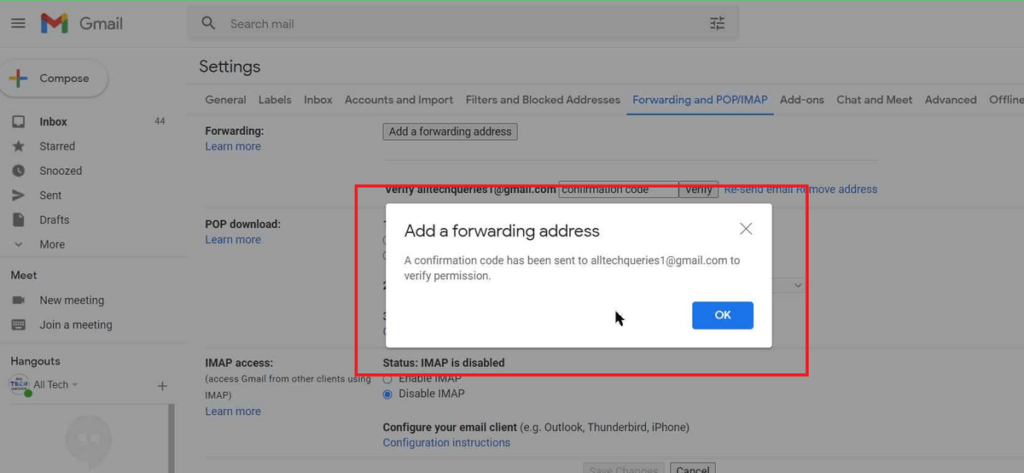
We have completed half the process. Before we proceed, you need to take care of two things.
- Do not close the Settings page yet.
- And do not log out of your Gmail account.
2nd Part:
- Now, log into your second Gmail account from a different browser or by using Incognito Mode.
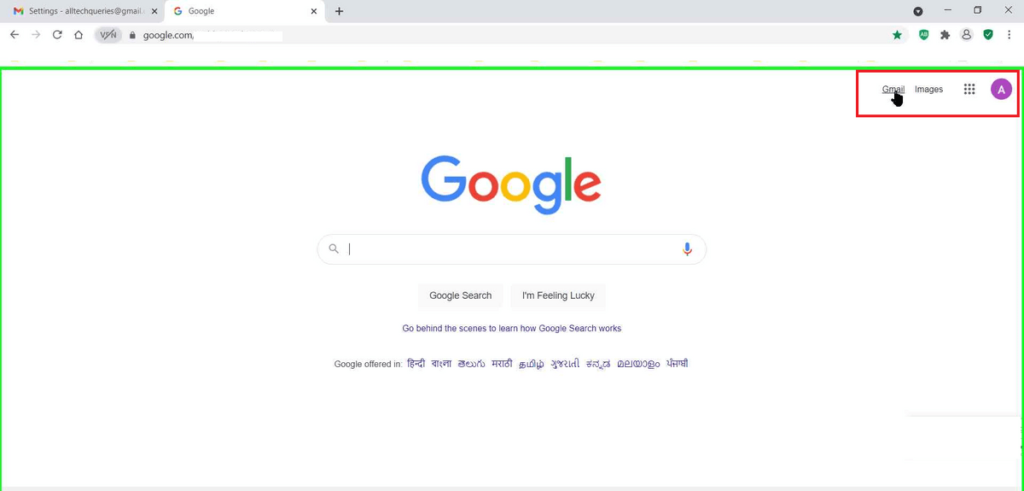
Continue with the process:
- You must have received an email from Gmail regarding the Email Forwarding Confirmation. Here you can do two things.
- Either click on the link to confirm
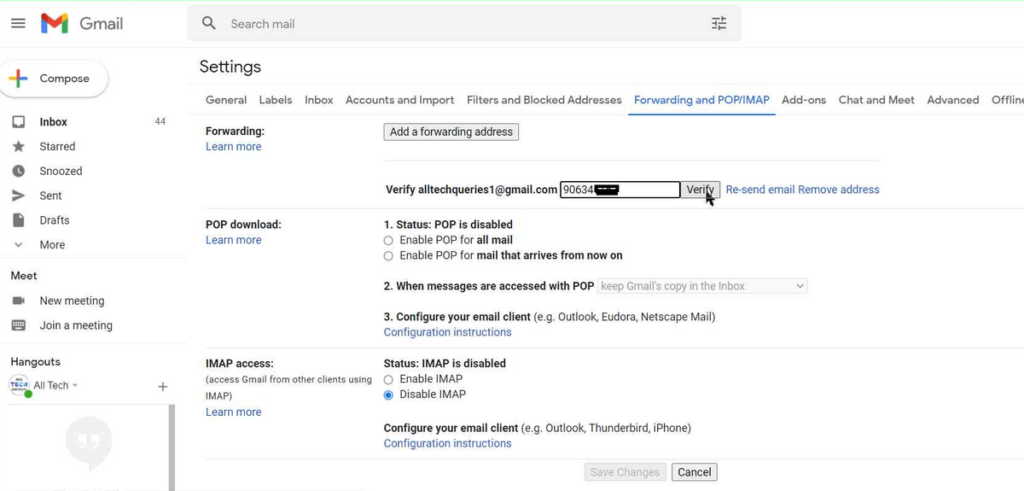
- or Copy and Paste the Confirmation Code into your first email.
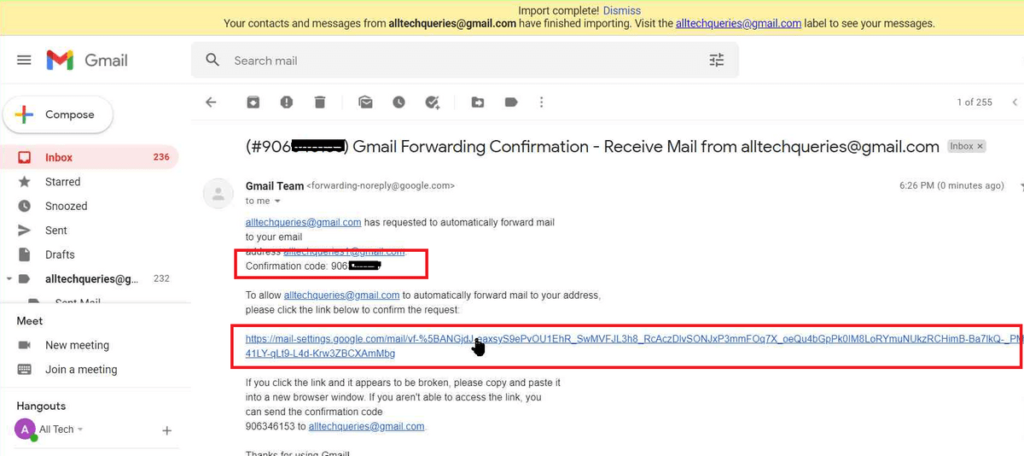
- So, open the link, and click on Confirm to approve the Email Address.
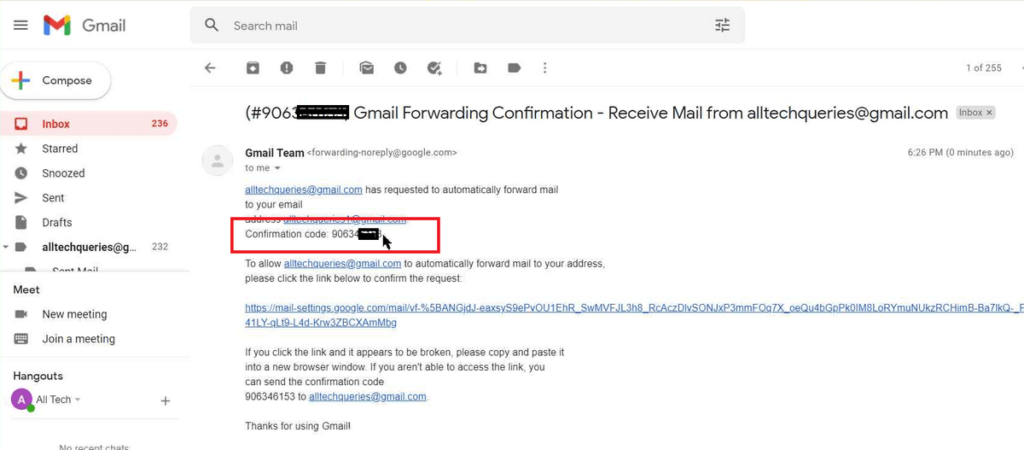
- Or, copy the confirmation code and paste it into the settings section of your first Email Address (as shown in the picture), and click Verify.
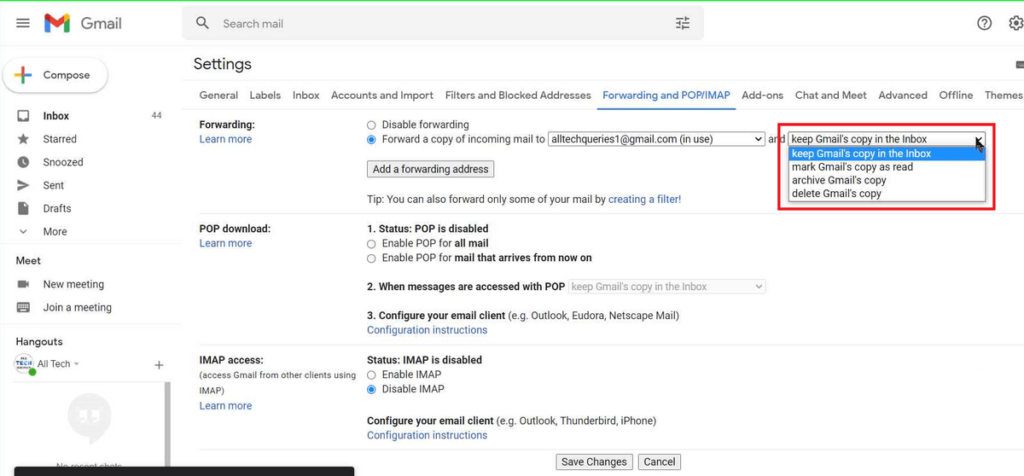
- Finally, you have to click on the Forward option, as shown in the image.
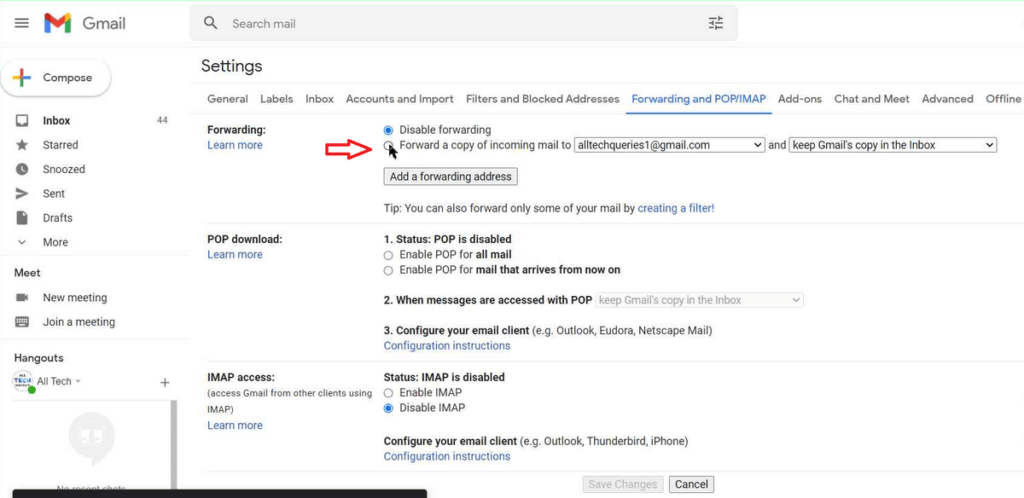
- Additionally, Gmail offers a few options.
- You can choose to
- Keep incoming emails in both the Gmail accounts
- Make incoming emails as read in the old Gmail account
- Archive the emails in the old Gmail account
- Forward Emails to the new Gmail account and Delete them from the old one.
- You can choose any of the options based on your requirements.
Conclusion:
Once you understand How to Automatically Forward Emails in Gmail, you can use it for any purpose. Make sure you enter the correct Gmail address as your inbox might contain sensitive information. Moreover, you have to allow pop-ups from Gmail to complete the task. Also, you can remove the second email after the job is done. You can even add more than one Email address but can keep only forward to one Gmail account at a time.

