Last Updated on February 16, 2022 by Tech Queries Team
In this article, we will show you How to Add a Password to a ZIP File on Windows.
ZIP is a compressed file created by the compression software WinZip. WinZip is a very popular software that lets you compress files/folders as well as Encrypt them.
Points to Note:
The files Encrypted using compression softwares like WinZip or WinRAR can be viewed. Other users cannot extract or open the files, but they can see what files are in the ZIP folder. Like, they can see what types of files and read file names as well.
To completely protect your folder, you might need a Third-Party Application. Check out this article on Put a Password on a Folder, where we have discussed more on the subject.
Do you want to add a Password to the existing ZIP file?
Or do you want to create a ZIP file with a Password?
Here are guides for both scenarios. You can Password Protect an existing ZIP File by using the first method, and you can create a password-protected ZIP File using the second method.
Before that, having a Strong Password is really important. So, check out this article on How to Make a Strong Password.
Table of Contents
How to Add a Password to a ZIP File:
Adding a Password to an existing ZIP File is very easy. This feature is not available in other compression softwares like WinRAR. Winzip Makes it much easier for the users by adding this feature. So, here I am going to show you How to Add a Password to a ZIP File on Windows in a step-by-step guide.
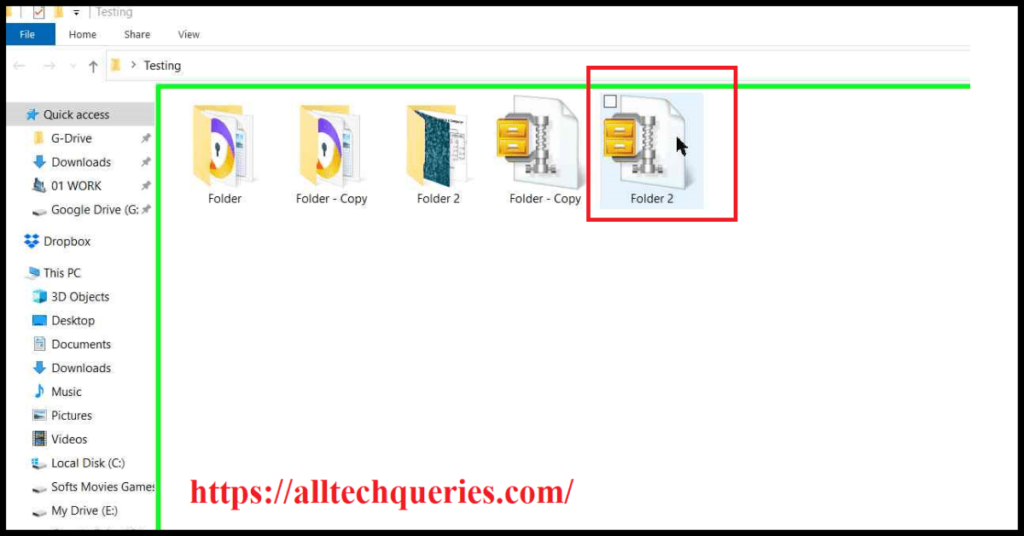
- Open the folder that contains the Zip file. Now Right-click on the file.
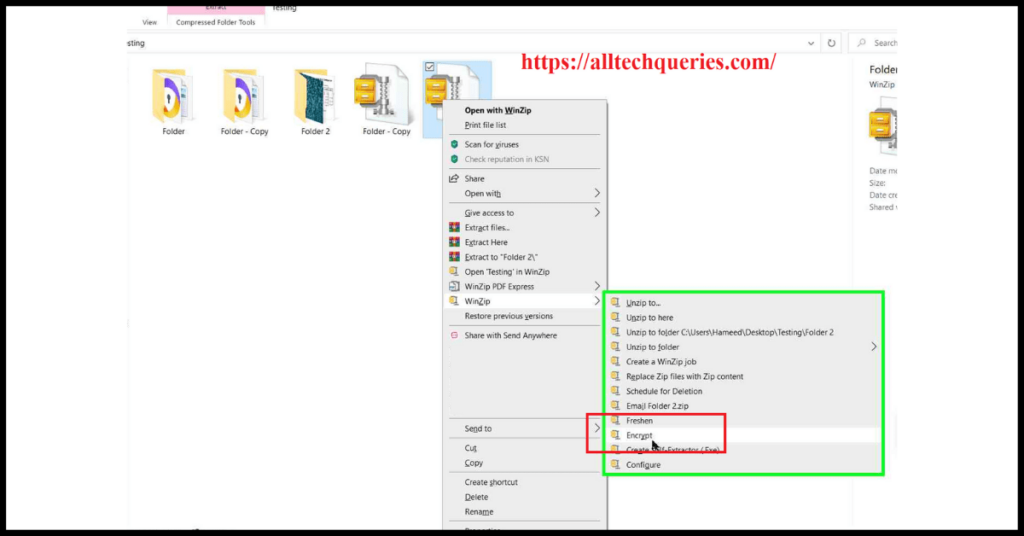
- Hover over the Winzip option, and a sub-menu will appear. Here, select the option Encrypt.
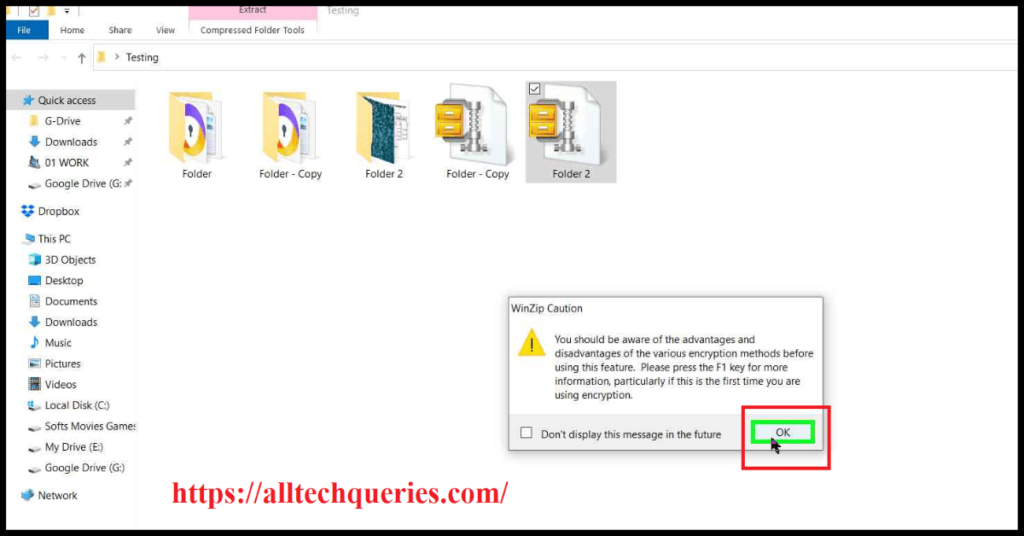
- You might get a caution message, where you have to click on the OK button.
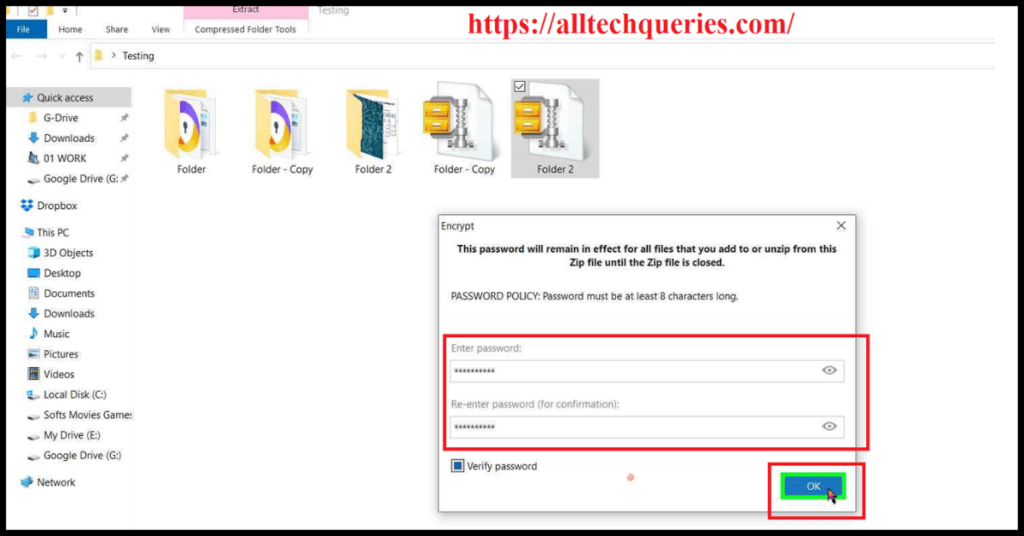
- Now, enter and confirm your password in the provided boxes and click on the OK button.
- You will get a message whether the encryption was successful or not.
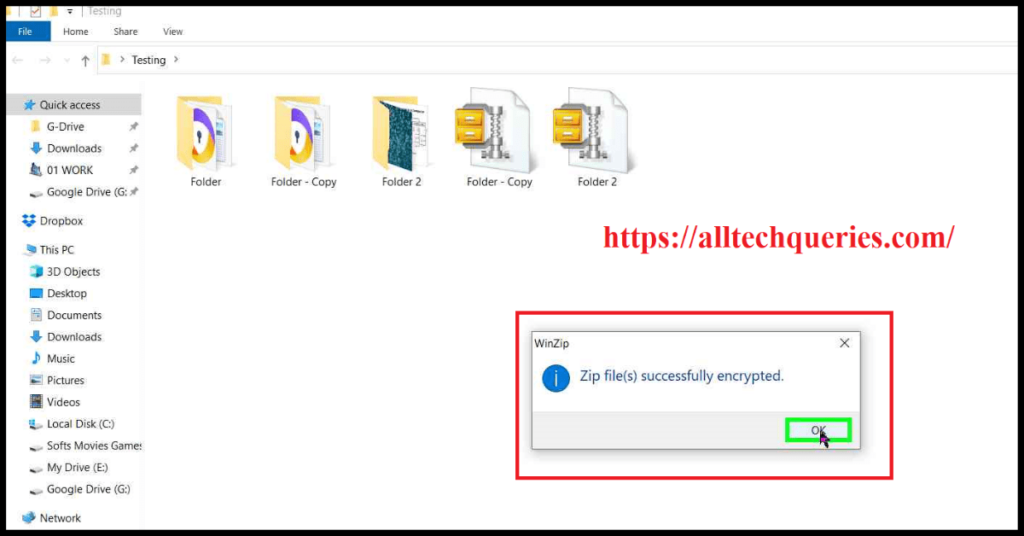
- Finally, your files are Encrypted.
Let’s check whether the Encryption was done properly or not.
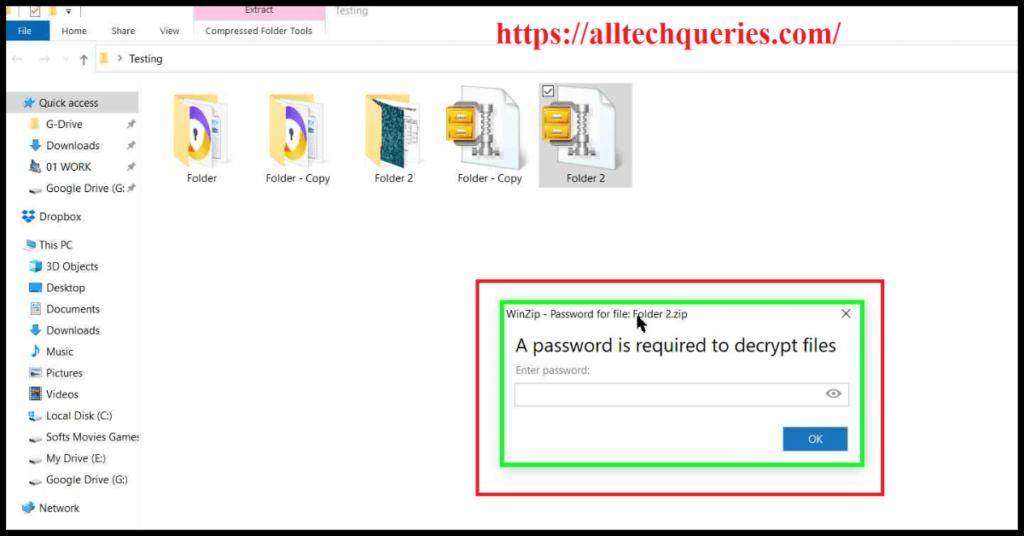
- Try to extract the files from the ZIP File. It should as you to enter the password.
Points to Notes:
You can only add a Password to a ZIP file by using WinZip. You won’t find the Encrypt option for other compressed files like RAR.
How to Create a Password Protected ZIP File?
- First, you need to Download WinZIP Free Version and install it.
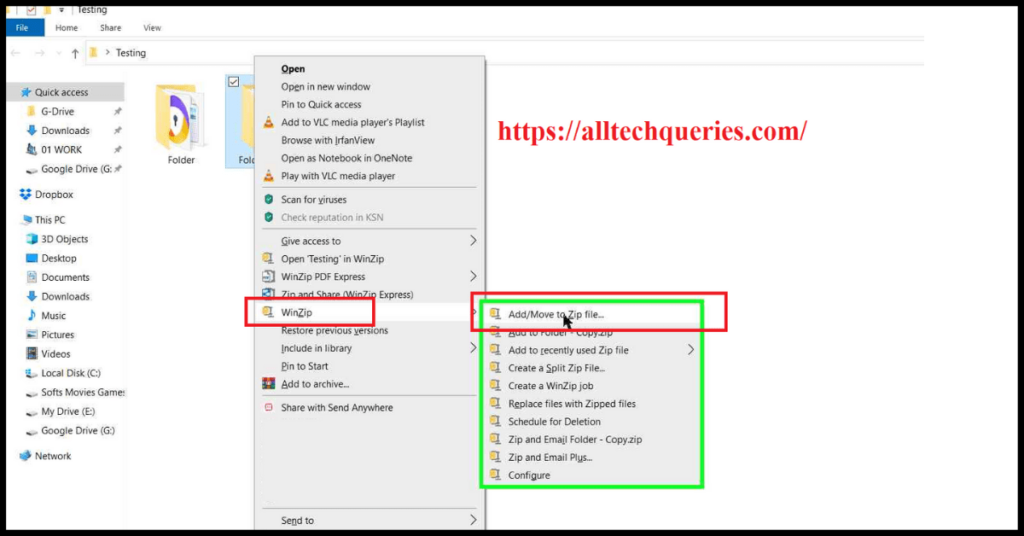
- Now, right-click on any file or folder, and you can see WinZip options in the context menu.
- Hover your mouse cursor on the WinZip option, and you will get a side menu.
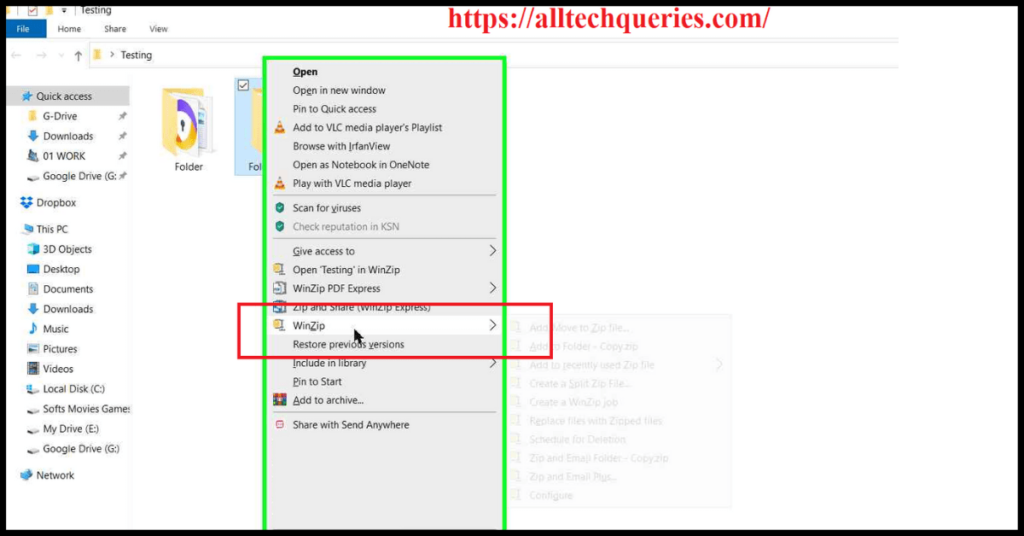
- Select the first option Add/Move to Zip File.
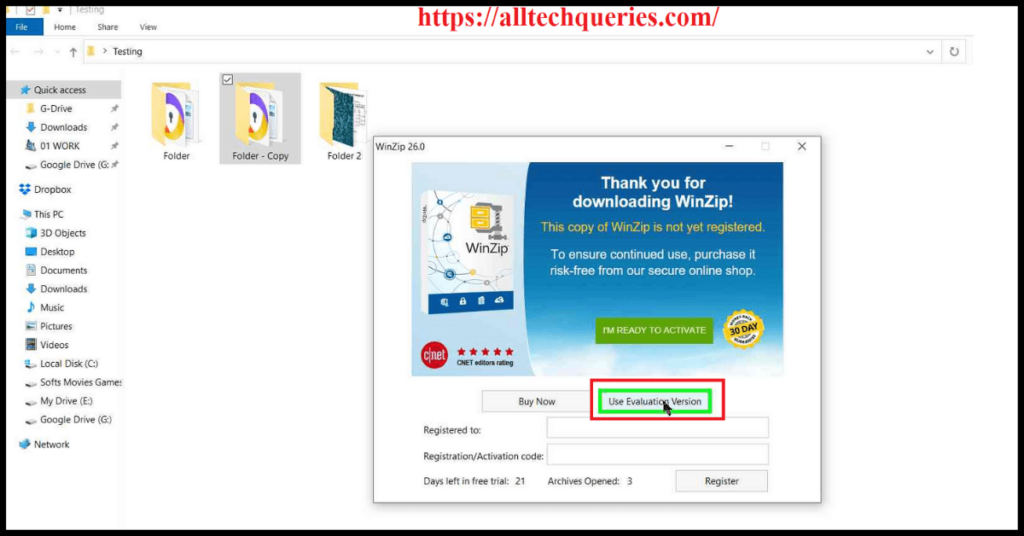
- Now, if you are using a Trial/Free Version, you need to click on the Use Evaluation Version button.
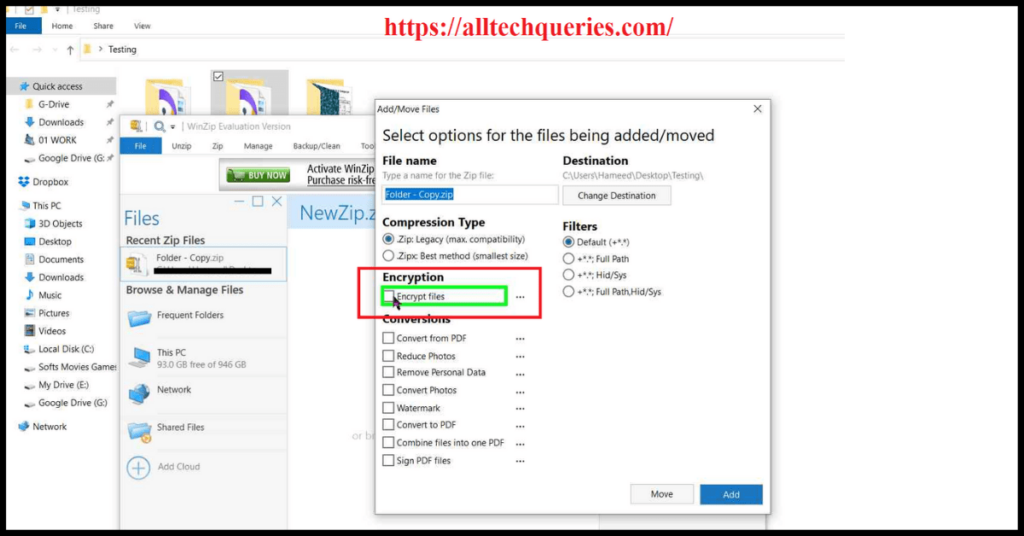
- If you click on Add, the Zip file will be created. BUT, we want to create a Password Protected ZIP File.
- So, check the option Encrypt Files (as you can see in the image)
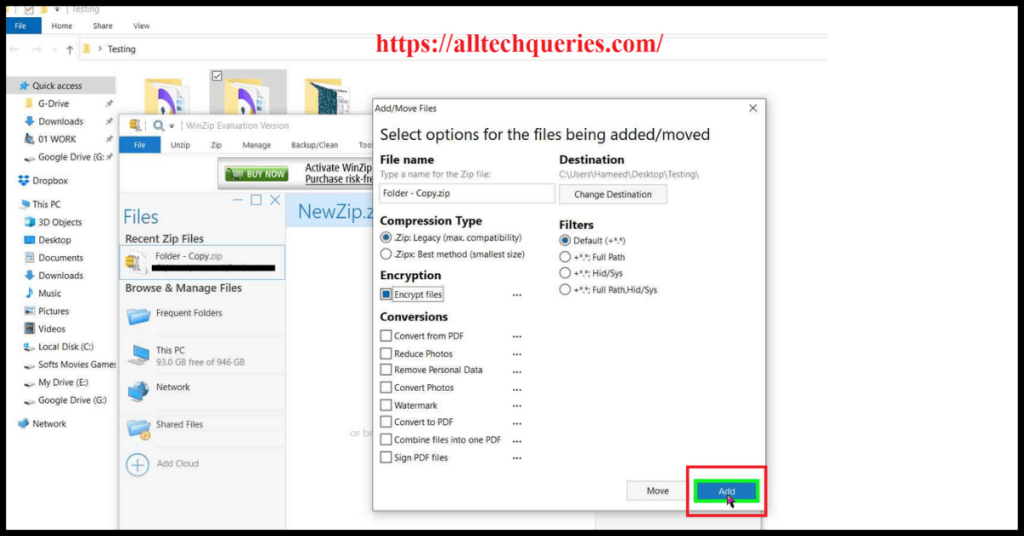
- And, now click on the Add button.
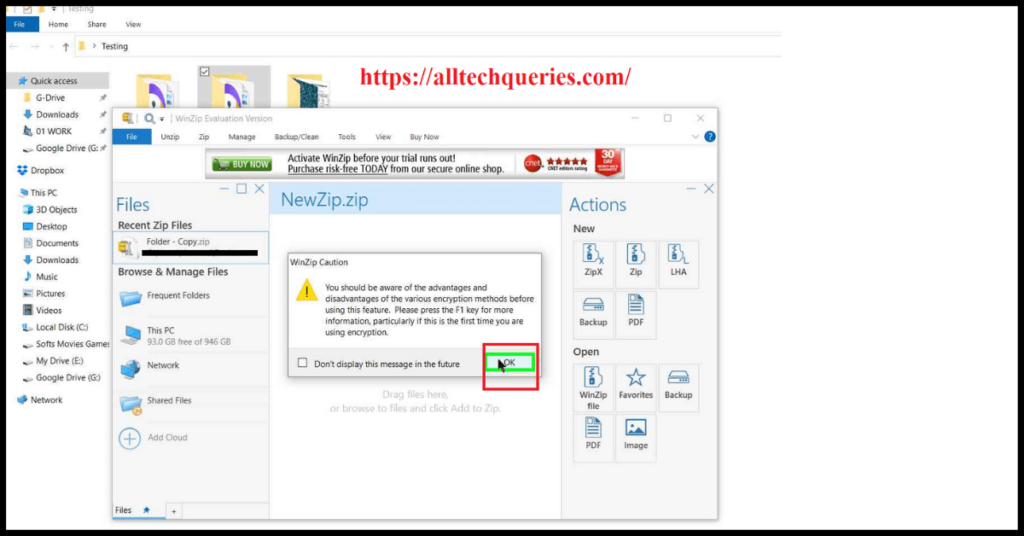
- If you get a Caution Message, click OK on it and proceed.
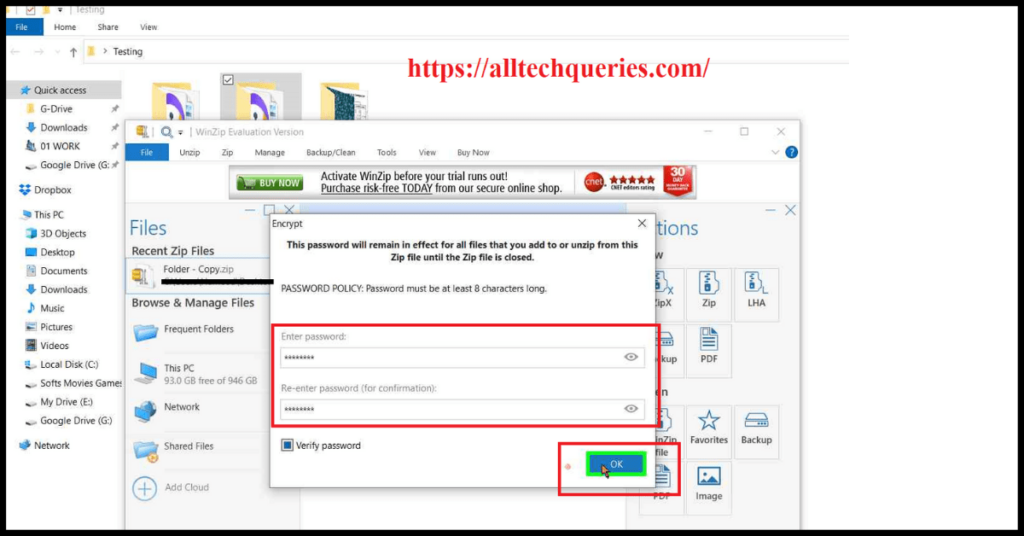
- Now, enter the password and confirm the password in the given fields, then click on OK.
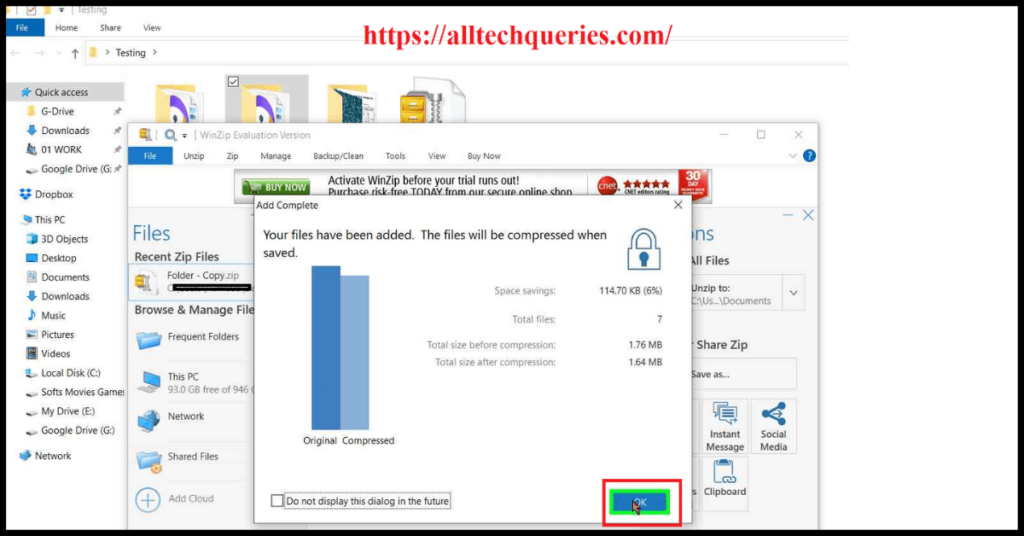
- WinZip shows how much disk space is saved after compressing the file. So, click on OK again.
- Finally, you have created a Password Protected ZIP File.
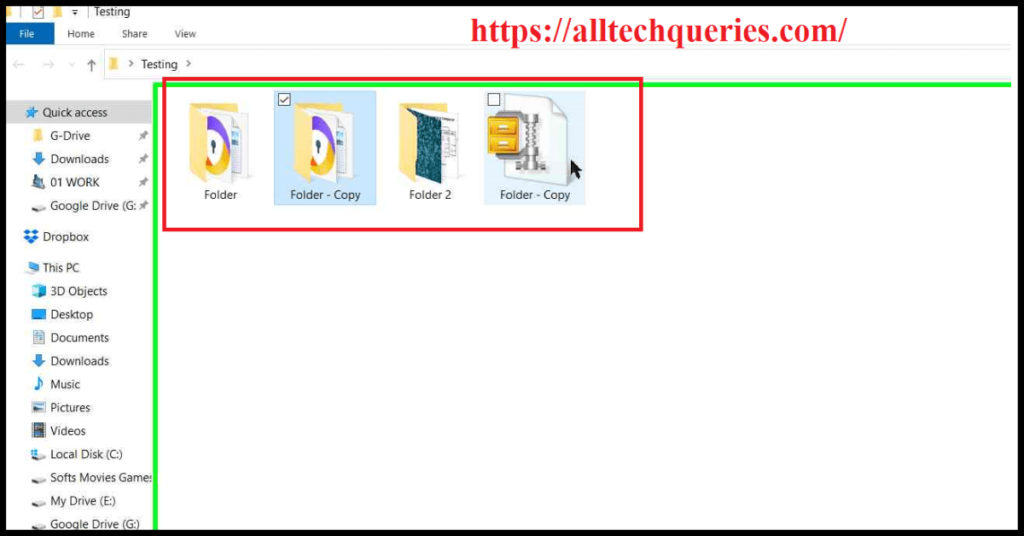
Let’s check now.
- Open the ZIP File, and you can see four options.
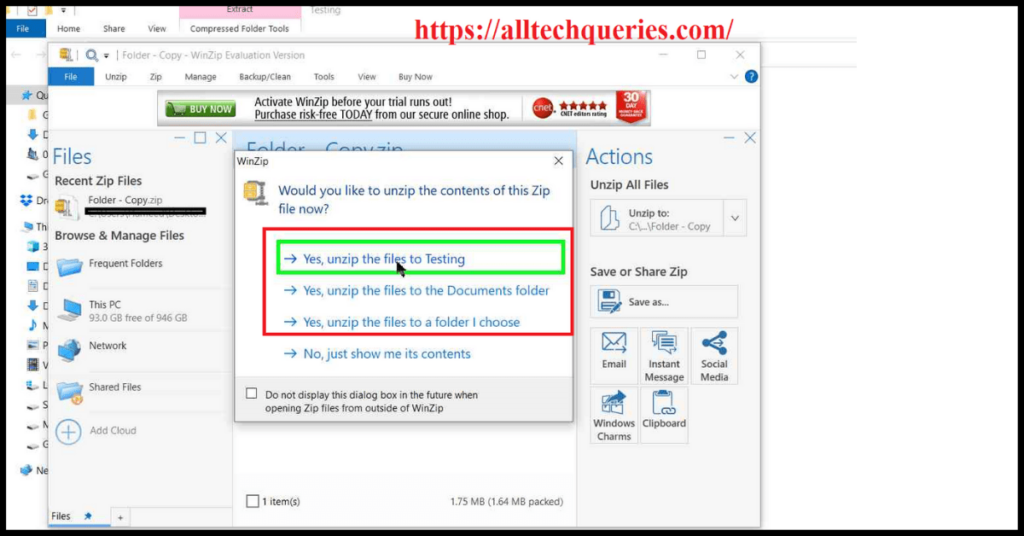
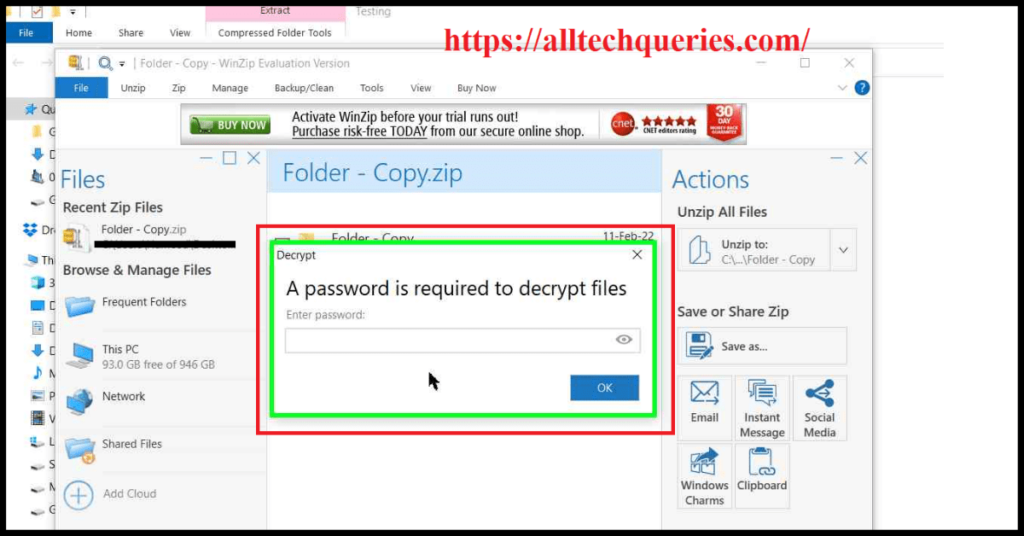
- If you choose Yes (Any of the top 3 options), it will ask for a Password.
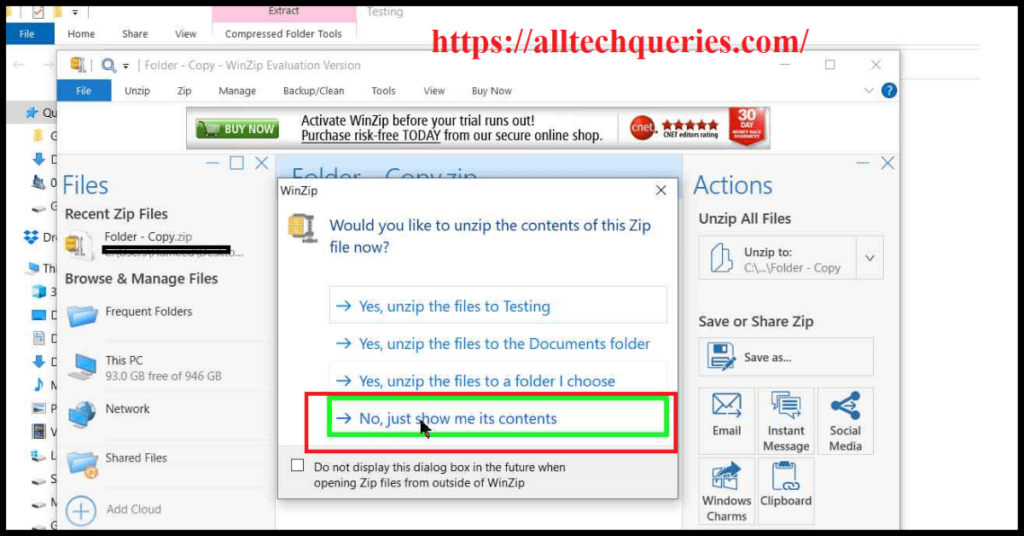
- If you choose No, you can only view the contents in the ZIP-File.
Final Words:
You can Password Protect your confidential files and folders by using any of the above methods. You can also use Third-Party Folder Lock Softwares if you want stronger security. I hope this article on How to Add a Password to a ZIP File on Windows helped you solve your query.

