Last Updated on June 9, 2022 by Tech Queries Team
One of the best ways to increase productivity on PC is working on multiple windows. However, when you drag a window to the edge of the screen, it automatically arranges itself. But, here is a guide that will help you Enable or Disable Automatic Window Arrangements Easily.
Table of Contents
Turn on or off Automatic Window Arrangement:
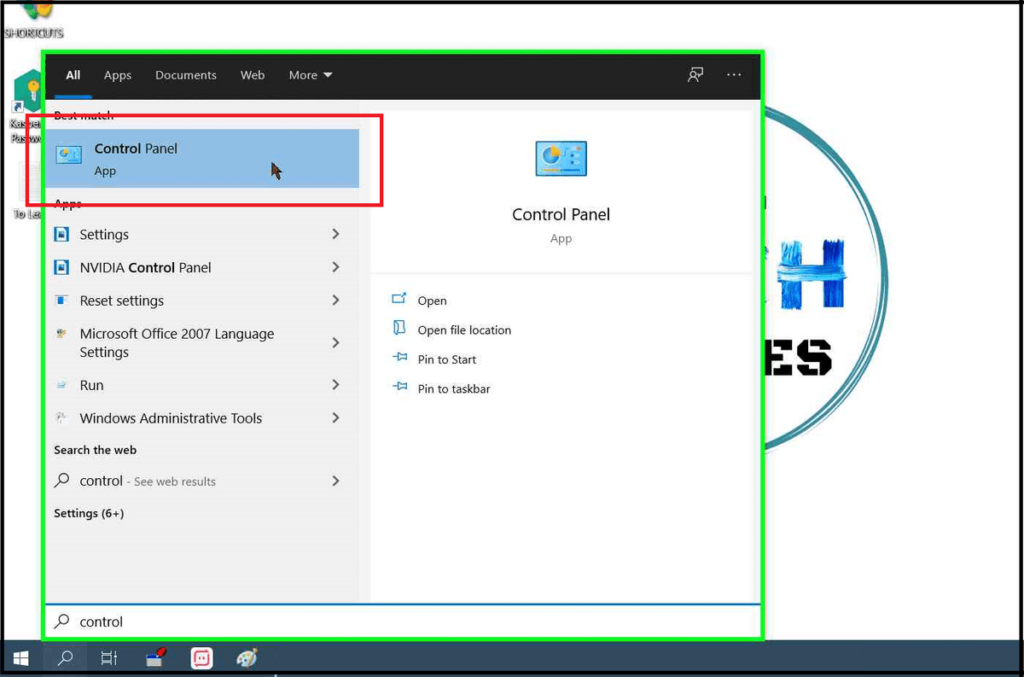
- First, type Control Panel in the search bar, and open it.
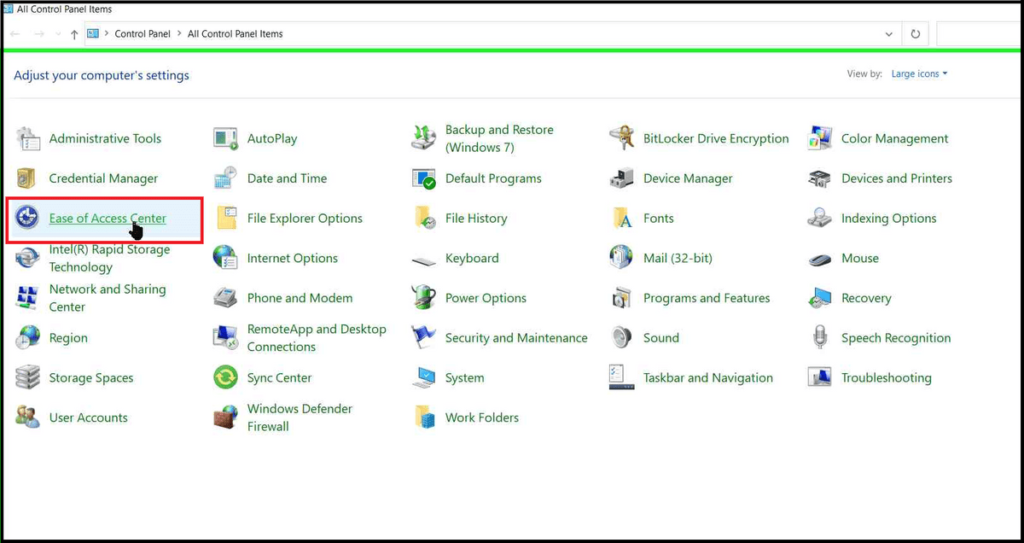
- Next, click on the Ease of Access Center.
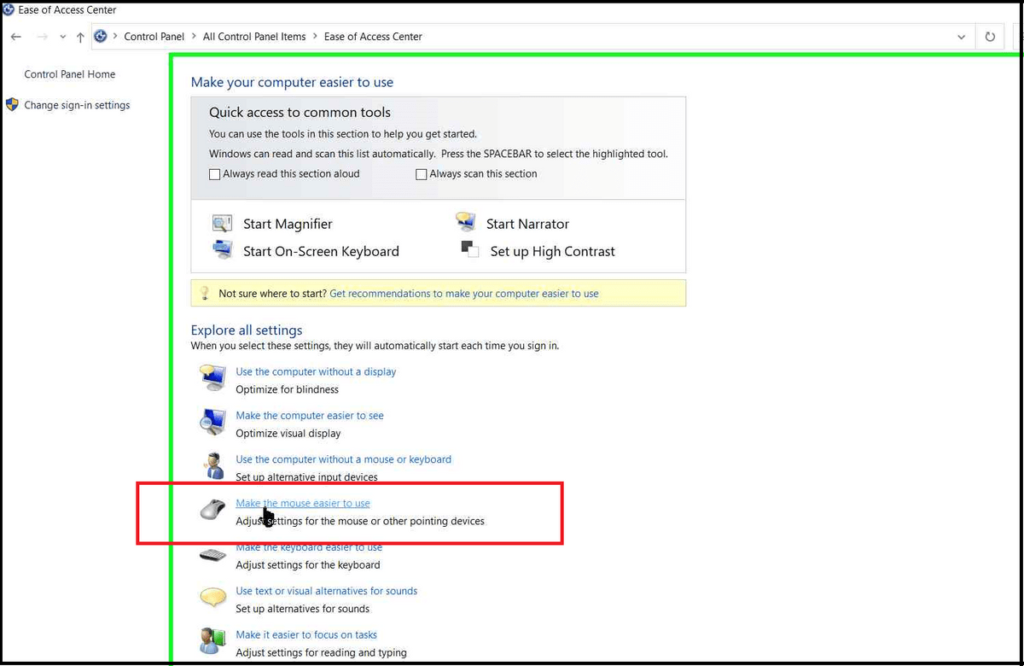
- Here, you will find the option “Make the Mouse Easier to Use“
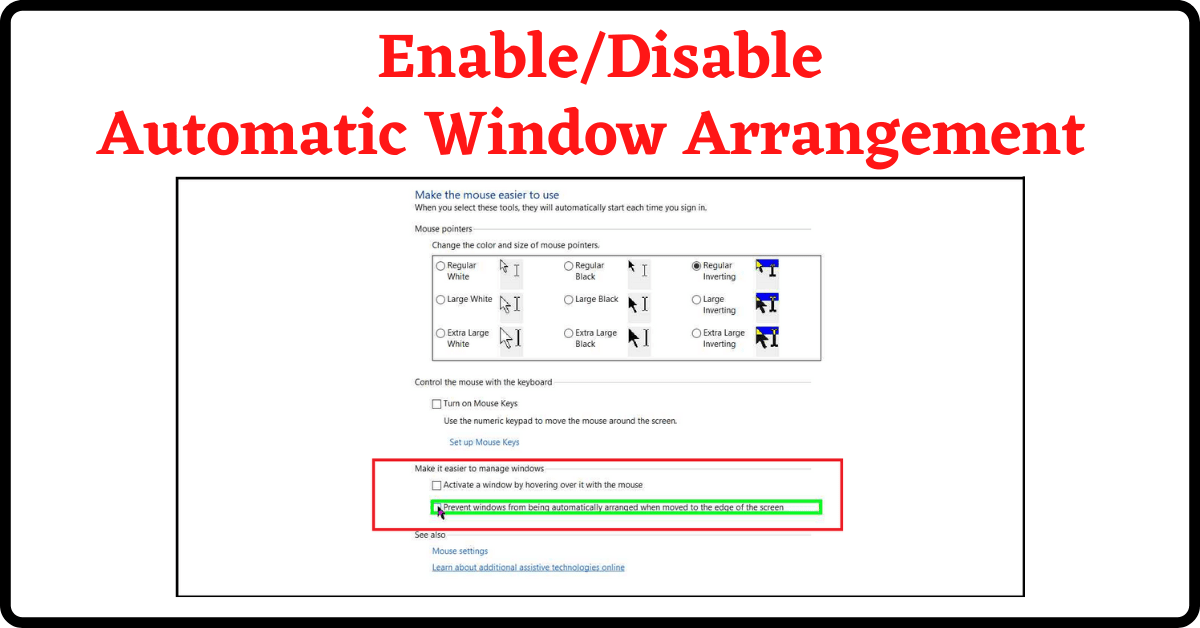
- Inside, you will find an option “Prevent Windows from being automatically arranged when moved to the edge of the screen“
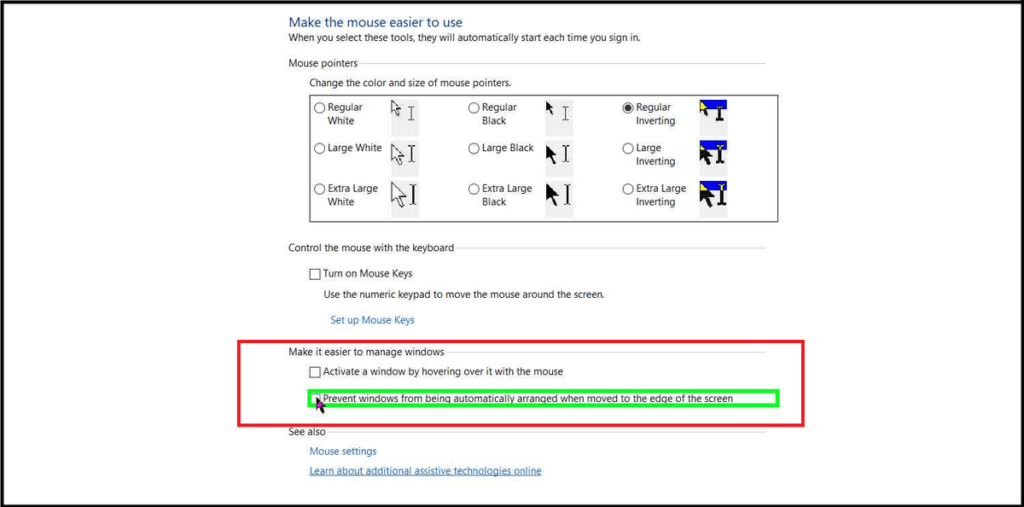
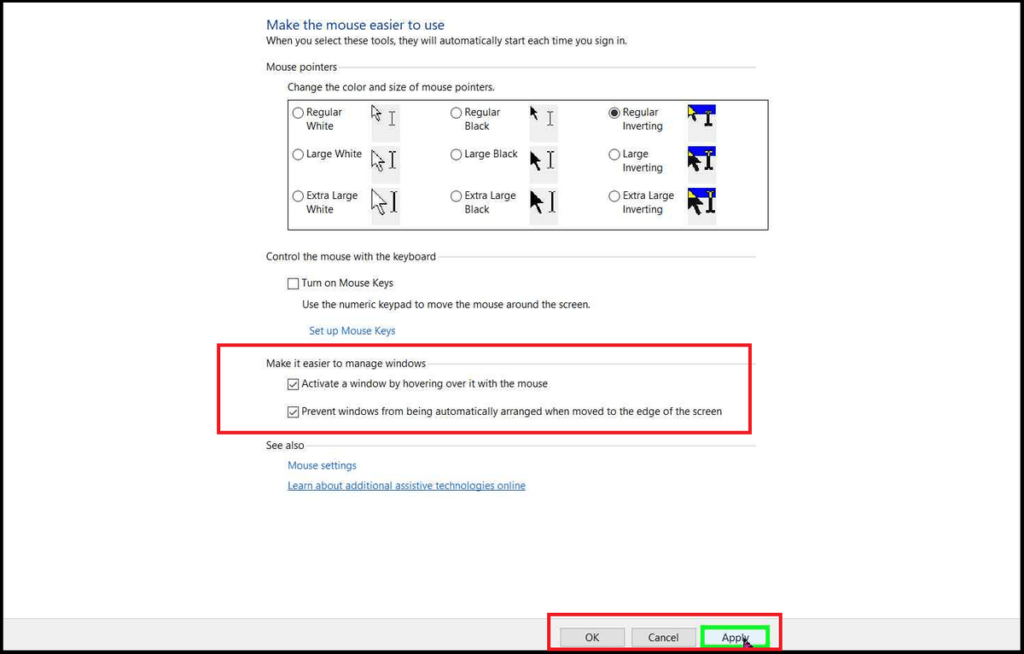
- Enable it. Click on Apply, then Ok.
More Productivity Options:
In the same window, there is also another option called ” Activate a Window by Hovering over it with the mouse“, which will make a window active just by hovering the mouse cursor. You don’t have to click on it.
Another way of increasing your productivity is by keeping a window on top of other windows. Read this article on How to Keep a Window on Top of others in Windows 10?
Conclusion:
By checking the option of preventing windows from automatically arranged, you Disable Automatic Window Arrangements. With this, you can arrange multiple windows on your desktop at your convenience.

